|
|
Post by swissdave on Oct 1, 2015 12:49:38 GMT
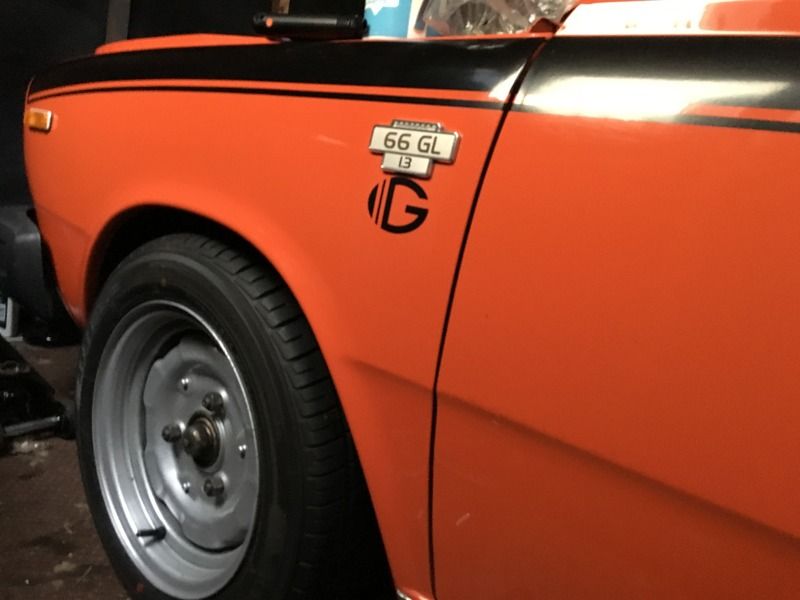
I thought it was time to start my own thread about my V66 rather than keep adding to Sam's original thread about the car which is here: dafcars.proboards.com/thread/2770/good-volvo-66-new-owner[/p]
It's also time to announce a name change from Olav to Gordon as this better suits his new character after the recent Gordini heart transplant. Whereas Olav was quiet, gentle and kind, Gordon is loud, uncouth and aggressive by comparison but a lot more fun. Link to the engine conversion thread: dafcars.proboards.com/thread/2846/r5-gordini-engine The recent rolling road test has shown the power to be approximately twice as much as standard and the focus now is to try to improve the handling to keep up with the sharper performance. I know some will question modifying such a nice standard car but I am making a point of not modifying anything that cannot simply be put back to standard and keeping all of the standard parts I remove. I have sourced some uprated gas front dampers and am having some new top mounts made with a camber adjustment facility but for this weekend I will be fitting a smaller dished steering wheel.
i.imgur.com/FbXdNhv.jpg |
|
|
|
Post by Richard DAF Webmeister on Oct 1, 2015 20:46:48 GMT
Just to confirm and reassure that I think it is completely fab!
|
|
|
|
Post by swissdave on Oct 4, 2015 18:13:56 GMT
So, firstly DO NOT fit a solid block in place of the rubber coupling in the steering column, it binds.:-(
I'm back to the standard one for now. This weekend I reset the front suspension back up to the standard ride height to see if this improved the handling, it made little difference although I had to reset the tracking so I tried some different settings, more toe in than standard, set to straight ahead-zero toe in, even slight toe out but settled on 2mm toe in which is the minimum recommended in the manual.
Amongst the constant adjust, quick drive, readjust sessions I also carried out a few 0-60 runs to try out using the Volvo's clutch servo for a quicker get away. The clutch in a Daf 66 starts to engage at just over 1000 rpm and is fully engaged by just over 2000 rpm. One of the changes that Volvo made to the 66 was to put a vacuum servo operated clutch release arm onto the centrifugal clutch. This is to allow shifting gear with the choke out and the engine spinning faster, something nigh-on impossible in a Daf 66 ticking over fast as the clutch is already starting to engage.
Using this on initial pull away allows higher revs before the clutch fully engages and hence more power. It seems to only work properly if you go from high vacuum conditions on tick over to full throttle quickly but I am nursing it slightly to be kinder to the propshaft.
In the video below we managed a high 8 second time with 2 heavy blokes in it, I tried it again immediately afterwards on my own and did 8.08, timed from outside. Yesterday when I hooked the clutch up perfectly it roared off the line and was probably a bit better still.
|
|
|
|
Post by swissdave on Nov 14, 2015 20:06:07 GMT
Gordon is now on his winter break and there's a long list of jobs to be done before he reawakens in the spring. The first series of jobs are on the front suspension, I will lower it back to about 2" from standard and fit some stiffer shock absorbers. These came from www.classicswede.co.uk but are Volvo 340 fitting, gas with 40 position adjustment (although minimum feels significantly heavier than standard) which will need some spacers making up to fit them. I will post the details of these as I go along for anyone interested. 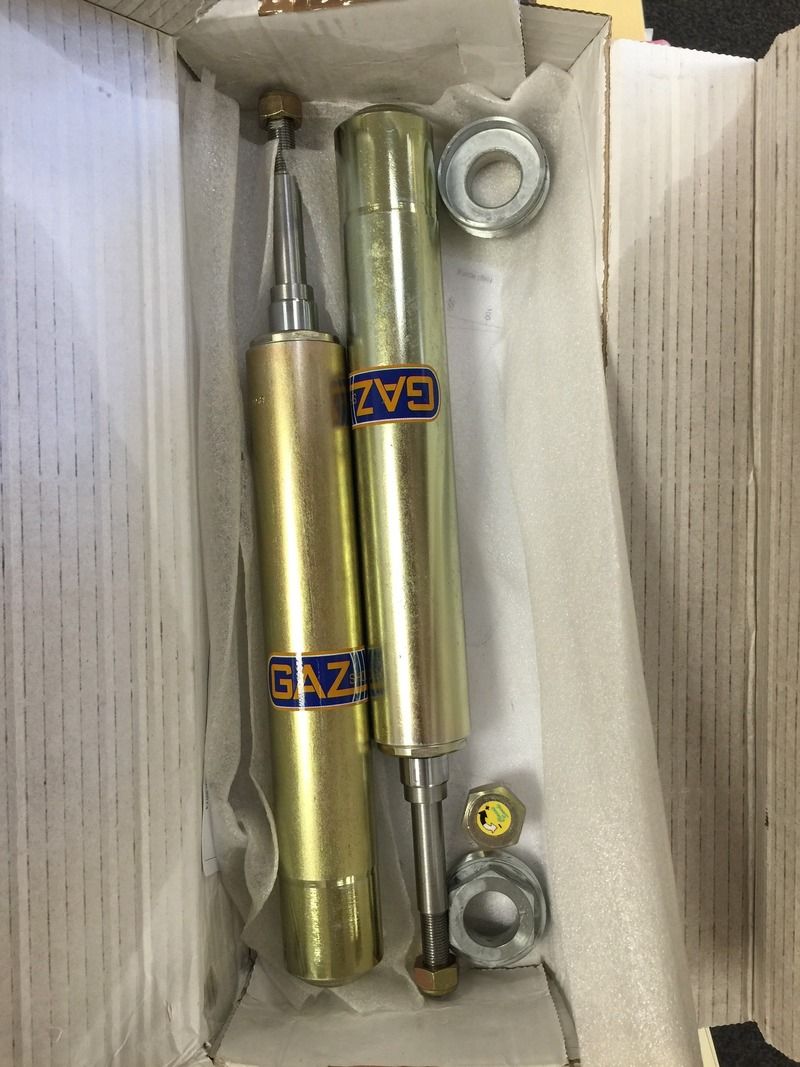 This is one compared to a standard Daf/Volvo 66 fitting insert; 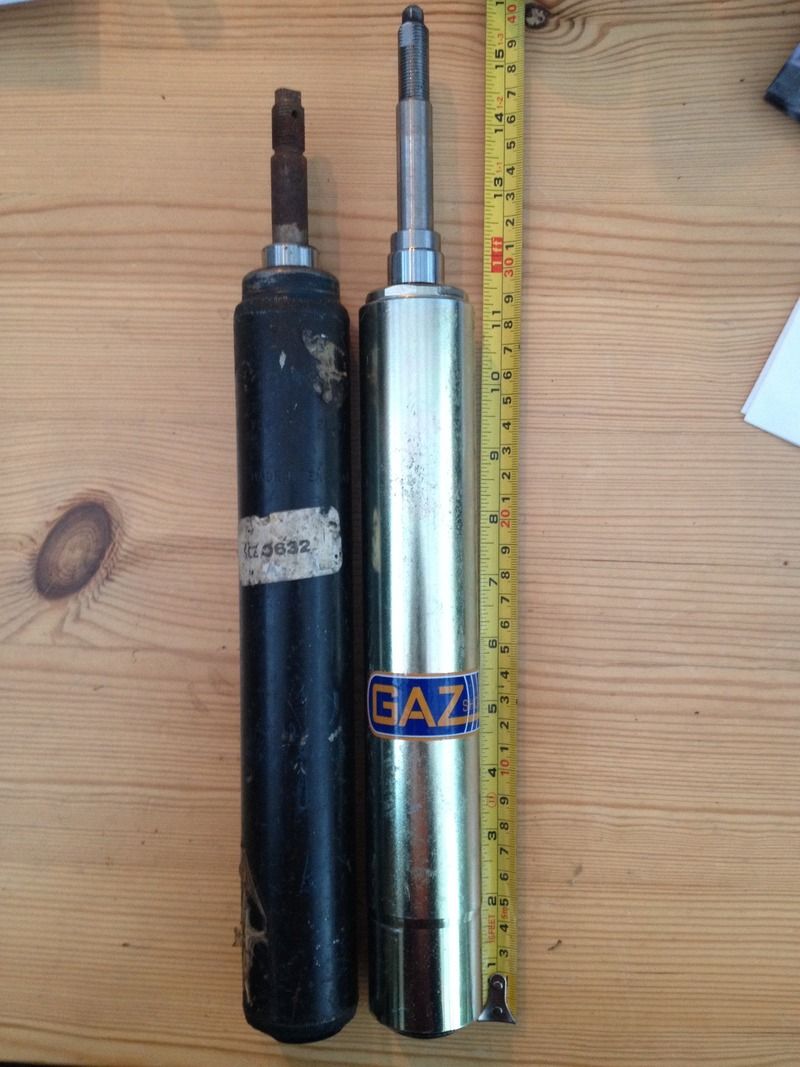 The shock absorber top mounts really need spacers if you're lowering an inch or more, the guys in Holland pointed this out to me as did Graham Meinhart at the Essex Dafs do recently so I have had some made; 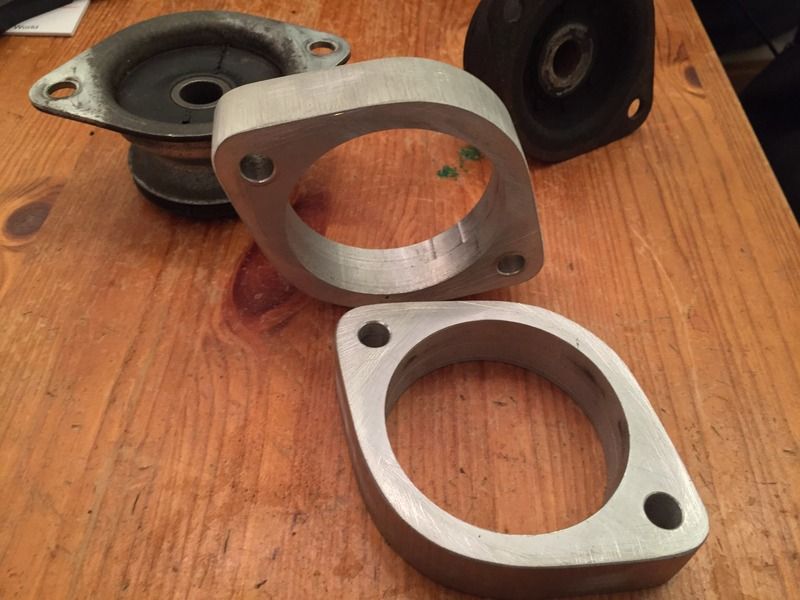 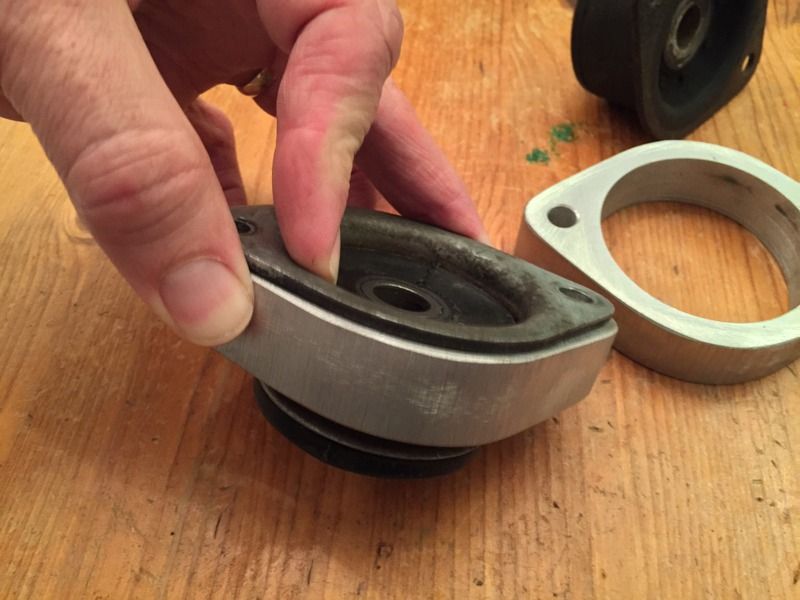 This stops the shocks from bottoming out, mine are 19mm thick, if only lowering up to an inch then I think you need more like 12mm. I could not figure out a way of providing camber adjustment easily without cutting the body shell which is a no-no. I will put some photos up of lowering the front by moving the lever arms on the end of the torsion bars. The normally recommended method of lowering the front suggests removing the torsion bars by driving them out of the bottom arms with a hammer. I tried mine and the almost musical ringing sound it made convinced me that I would badly damage it before it moved. I did however find that the lever adjustable arms on the other end of the torsion bars can be moved round on splines on the bar and that is how I lowered mine the first time and will do this time. I also want to strengthen the front anti roll bar with a DIY adjustable double width kit. I've never made one before but it involves clamping the straight section of a second anti roll bar to the original, again a picture paints a thousand words etc so I will post them when I do it. |
|
|
|
Post by classicswede on Nov 14, 2015 21:37:25 GMT
I can see a bit better what needs doing with that special version (normal 340 ones are much longer) to make them a direct 66 fitment. If I could borrow one of them once you have the adjustables fitted that would be great.
I also have an idea on how to gain some camber - will message you
|
|
|
|
Post by swissdave on Jan 16, 2016 18:59:47 GMT
The new front shock absorbers still aren't fitted, it took me ages to get around to measuring everything properly and producing some drawings for the engineering shop to make some spacers up, they are hopefully making them next week. In the meantime I have refitted the 1" lowering blocks to the rear springs and removed the rear shock absorbers awaiting some special replacements from our man Dai at Classic Swede. The front suspension has had some work too, I have lowered it back to -2" and made the anti-roll bar upgrade.
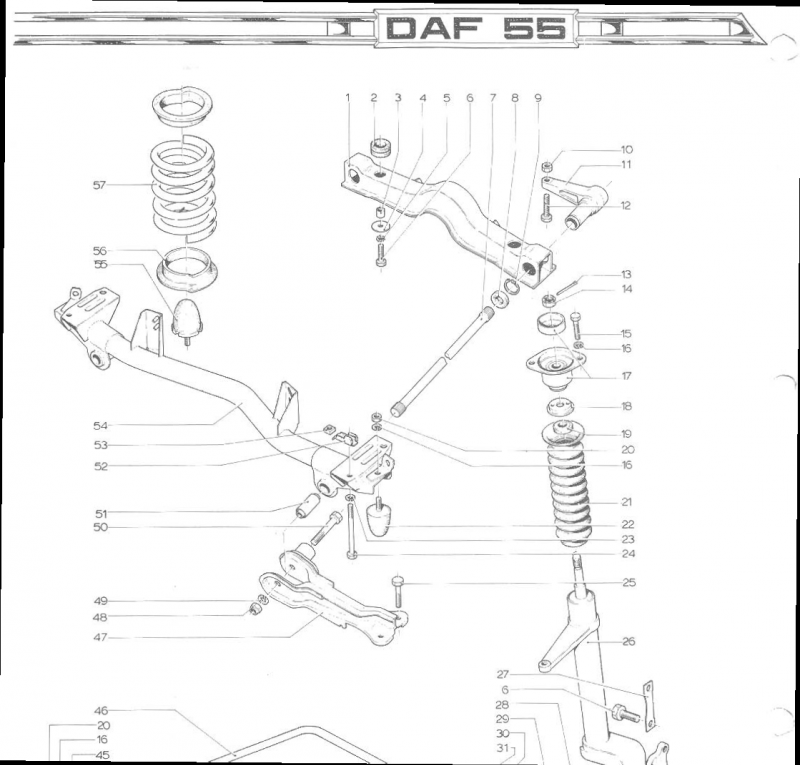
As I said earlier in the thread, the recommended way of lowering the front would appear to involve removing the torsion bar (part 7) from the suspension arm (part 47) and moving it round a couple of splines. As you can see from the diagram (ignore the coil spring bits, they're rear 55 and don't apply to this.) the bolt that holds the arm on (part 50) is in the way of the end of the torsion bar, I tried hammering this to get my torsion bars out when I lowered the car originally and they were stuck absolutely solid. I then found that on my 66 the adjuster arms (part 11) were just slid onto splines on the other end of the torsion bars and if I removed all pressure on the suspension arms by separating them from the struts and reaction rods so that they were free to move a little, the whole cross member and adjuster assembly would slide back and allow the torsion bars to be moved relative to the adjusters. The cross member can then be slid back on to the torsion bars, just in a different position, on a different spline.
There are only two 17mm bolts holding the cross member to the body in this position each side.
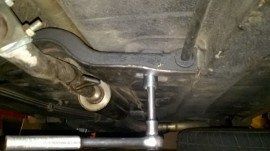
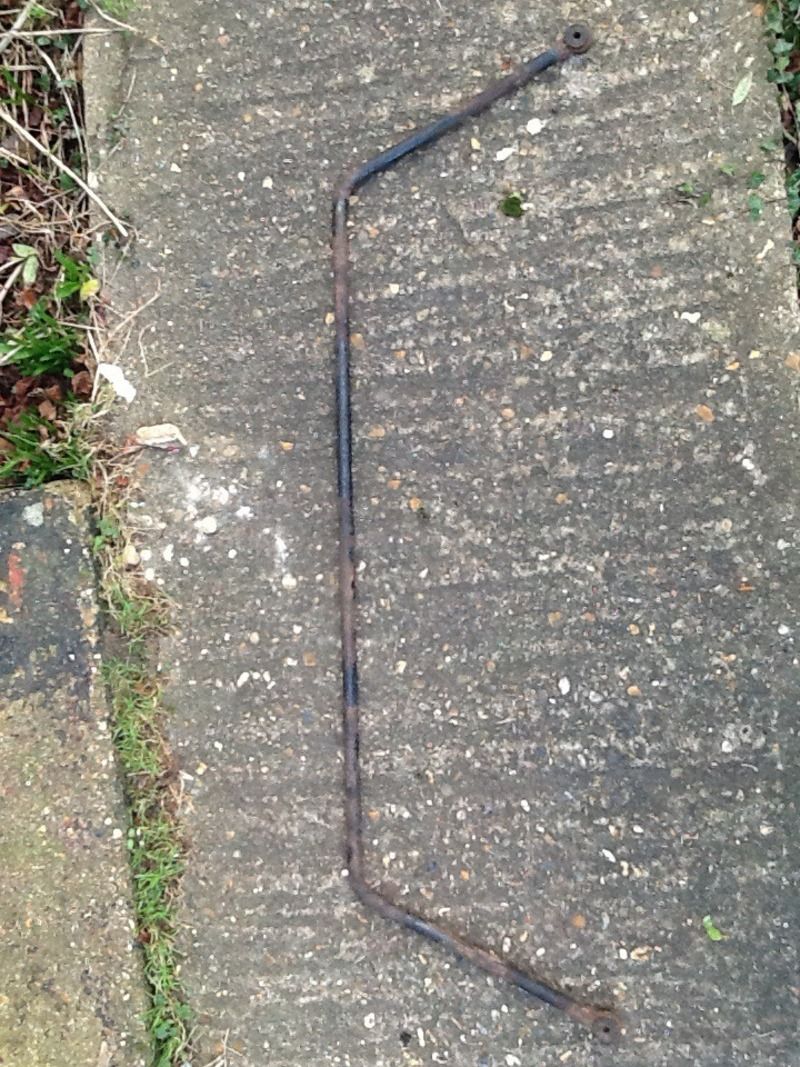
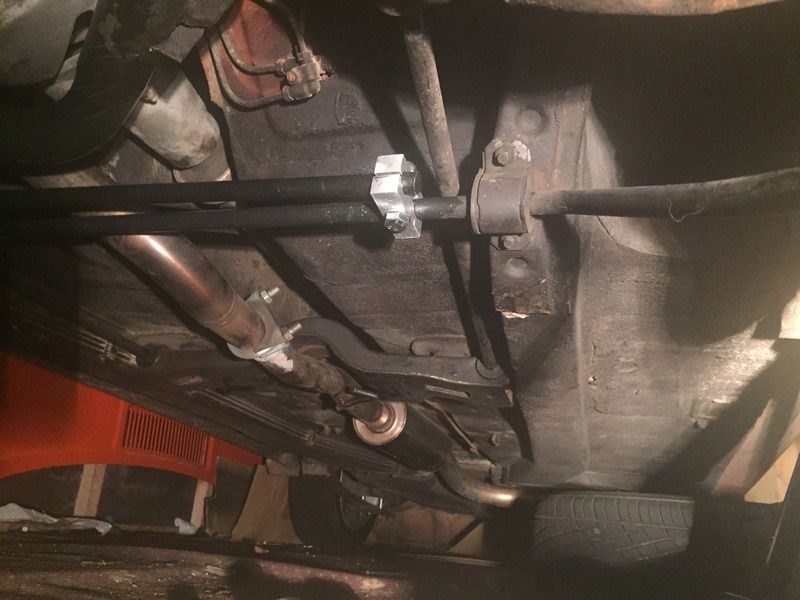
The standard anti roll bar on the 66 is quite spindly at only 16mm and as I am uprating the whole suspension I wanted a bit less roll when cornering. This mod is a cheap way of increasing roll stiffness, I borrowed and fitted one a friend had made to my old Reliant Kitten years ago and it worked brilliantly, the system is also adjustable, the wider the clamps the greater the increase. Matt at Essex Dafs provided a spare bar which I cut down to length, just inside the position where the mounting runners sit, wire brushed and painted it.
The clamps were made from a length of 15 x 20mm alloy bar, £5 off ebay. 4 pieces were cut to length (2 for each clamp) and I cut up some 2mm thick sacrificial strips for the drilling too.
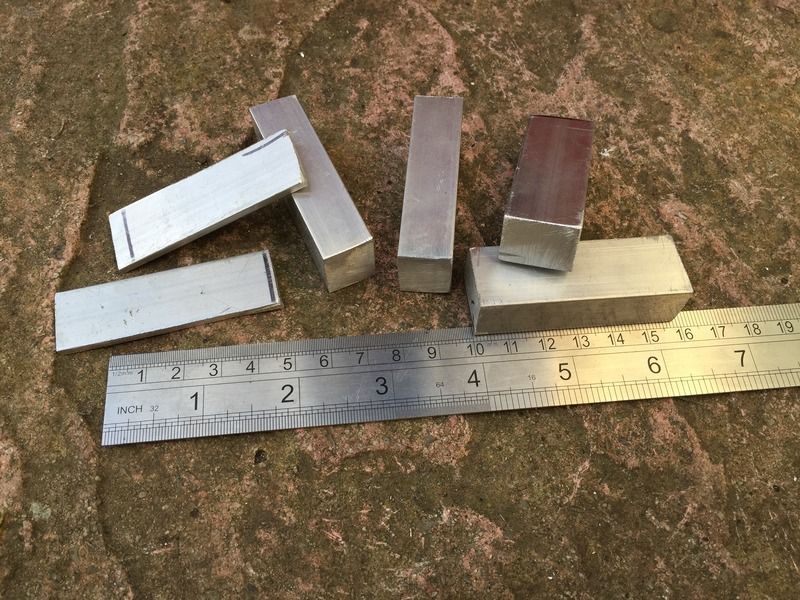
These were clamped and drilled with 2 x 16mm holes.
The single 10mm holes were drilled crosswise for the clamp bolts and they're ready.
The extra anti roll bar now clamped to the original.
|
|
|
|
Post by swissdave on Jan 27, 2016 19:43:03 GMT
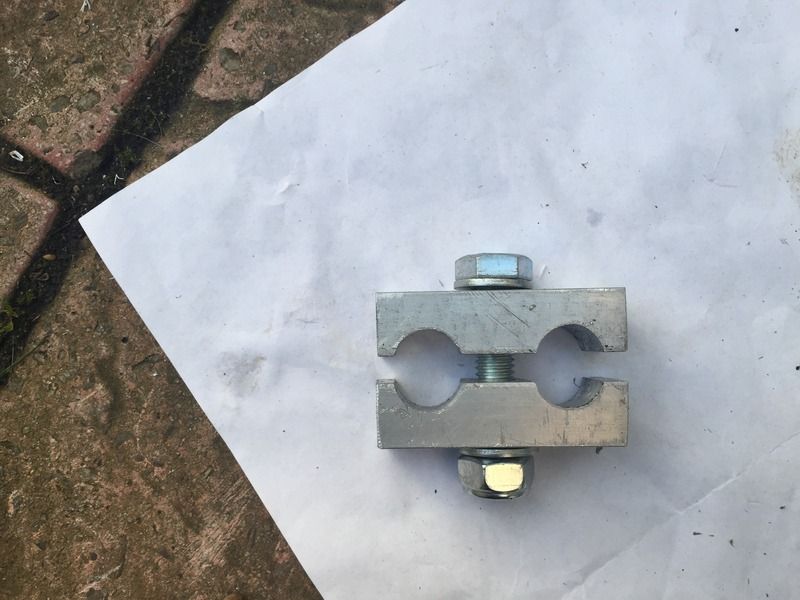
I have changed way that I am doing the double anti roll bar setup after being shown a better way of doing it, Matt provided another anti roll bar which I cut just the ends off this time, leaving the majority of the arms still on the ends of the bar. 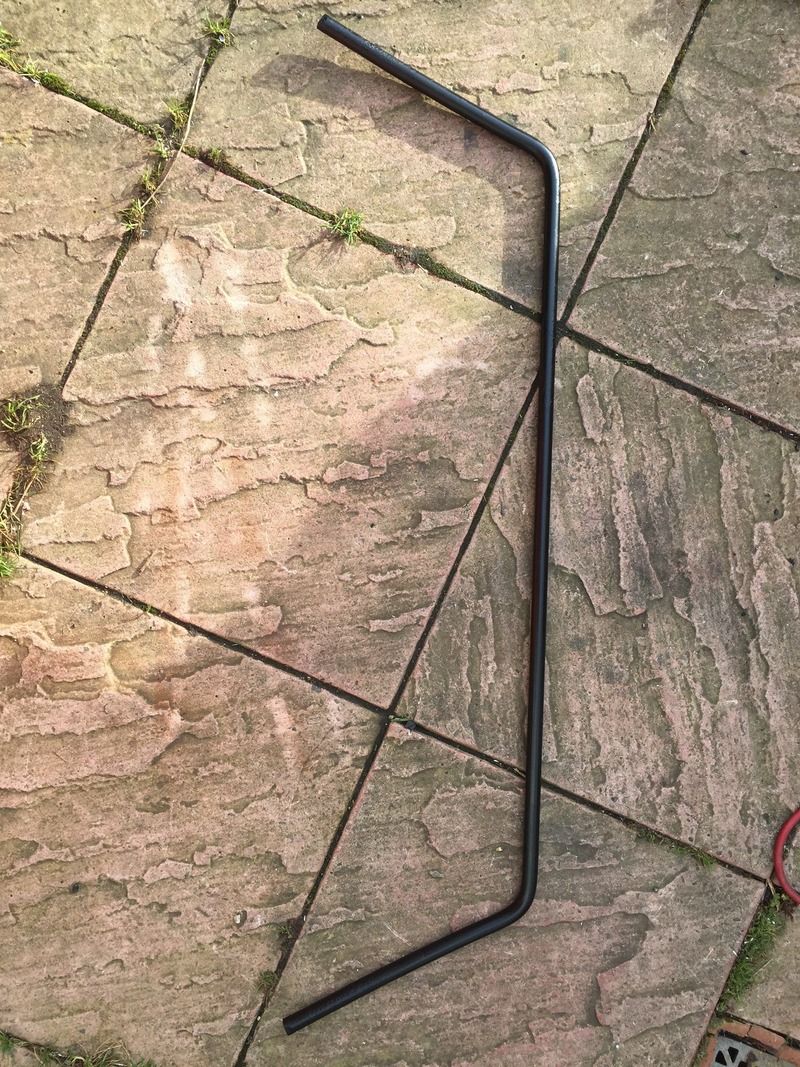
This setup needs an extra two clamps but to save the hassle of making more from alloy bar I'll be using these type of pipe clamps instead: www.ebay.co.uk/itm/262228336435?_trksid=p2057872.m2749.l2649&var=560982202758&ssPageName=STRK%3AMEBIDX%3AIT , doubled up with longer bolts to bolt the two bars together one above another, clamped near each rubber mounting and near the end of each arm: 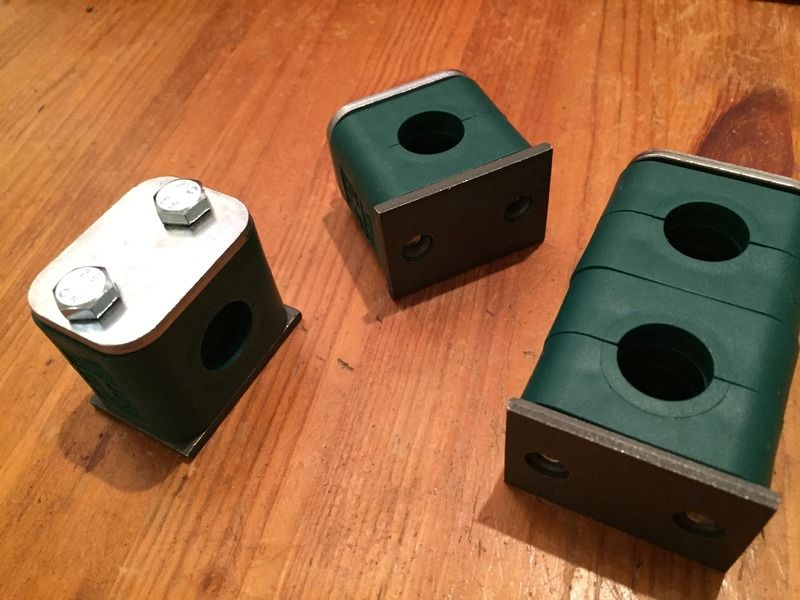
The front shock absorbers are still waiting for the spacers to be made, I'm hoping by next week they should be ready and I can put the front suspension back together, I'll post a picture of the fitted anti roll bar then. I've got 4 ongoing parts of the project that are started on the car but can't be finished due to waiting for something!
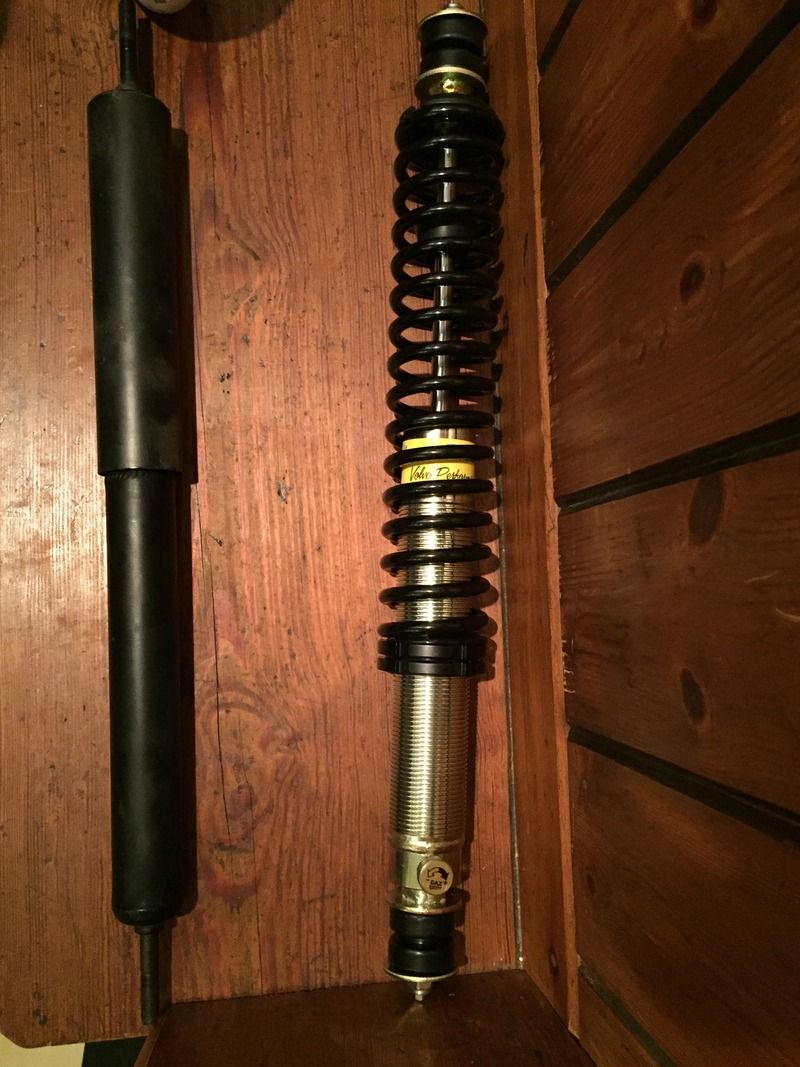
One of the half finished parts took a big step forward today when I fitted the new rear shock absorbers which arrived by courier from Dai at Classic Swede . It turns out that Volvo 66 and I guess therefore Daf 66 have the same rear shock absorber fitting as Volvo 340 and 360, give or take a few mm in length. I wanted gas shocks to match the front and as the car frequently carries 4 of us and luggage the rear had felt a bit soft so I was also looking into ways of helping the rear leaf springs. I have seen photos showing a Dutch Daf 66 with small extra leaf springs inserted between the original leaf spring and the bottom plate. These small springs had apparently come from the front suspension of a Daf 33 and the owner reported improved handling so I thought this would be a good way to go but amongst the gas shock absorbers that Dai offers are a coilover type. I have chosen the lightest springs which at 80 lbs may still be too heavy but I'll see how it goes and adjust from there if I need to. I have some very light 7lb helper springs coming to allow a bit more initial movement before the main spring compresses.
Compared to standard V66 one:
Fitted:
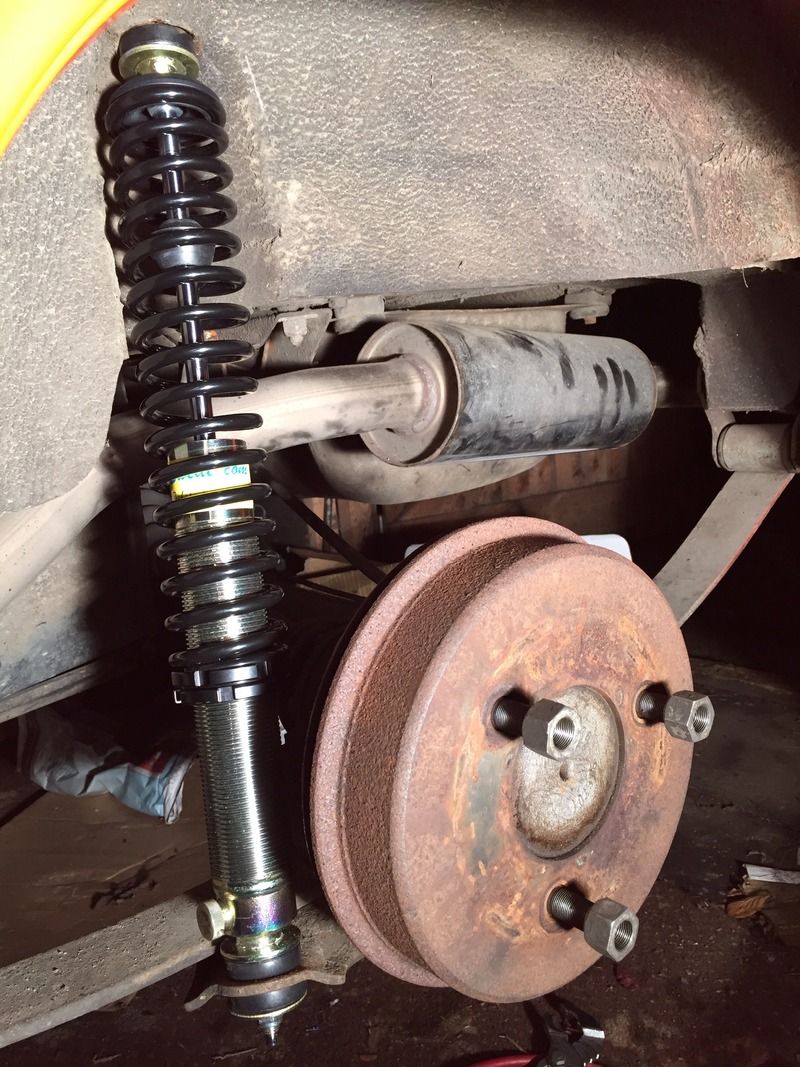
Quite close to the body but this is with the suspension unloaded, the axle swings rearward, and moves the spring away as the suspension compresses.
I have set the springs to the minimum compression and with the 1" lowering blocks already, some more news on the front suspension soon hopefully!
|
|
|
|
Post by andrejuan on Jan 27, 2016 20:00:43 GMT
I'm glad you changed that ARB setup. With the old mod. I couldn't work out how it would help? With your plan "B"
it is much easier to understand. :-)
|
|
|
|
Post by swissdave on Jan 27, 2016 20:12:59 GMT
Yeah, I think dementia must be setting in, I was sure that was how Al Osbourne had done the last one but I must be mistaken as it doesn't look right to me now either.
|
|
|
|
Post by mtjm on Jan 28, 2016 10:36:04 GMT
A small note of warning about the rear coilovers. When fitting coilovers to a car that never had them as standard it's often a good idea to reinforce the body shell around where the shock mounts. I know you're only using them as additional springs rather than main ones but it can still mean quite a lot of force being delivered to an area that is not meant to receive it. I know that quite a few classic Mini owners who have converted to coilovers at the back have ended up with the top of the shock tower being ripped away from the rest of the body shell.
|
|
|
|
Post by swissdave on May 1, 2016 9:06:11 GMT
Unfortunately a lack of time has slowed getting the car finished and ready for this year's MOT but I am getting close now. The rear suspension coil-overs were still too stiff even with the spring adjusters wound down to give the minimum preload to stop the springs unseating. The rear just sat too high and I was worried that it would be a bit too bouncy. I managed to find some 4" long 7 lb (!) helper springs that I have now fitted in addition to the standard coil springs: 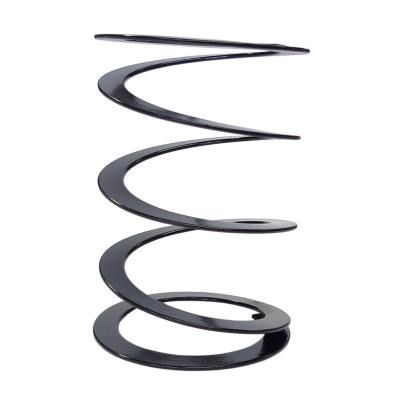
With these fitted the ride height is just below normal (about 1/2") despite using the 1" lowering blocks but may settle a little when it's been driven a bit more. The stiffness is more realistic too as the lighter helper spring has about 2" more compression until it starts to compress the heavier spring giving a more progressive increase depending on load, this is at ride height: 
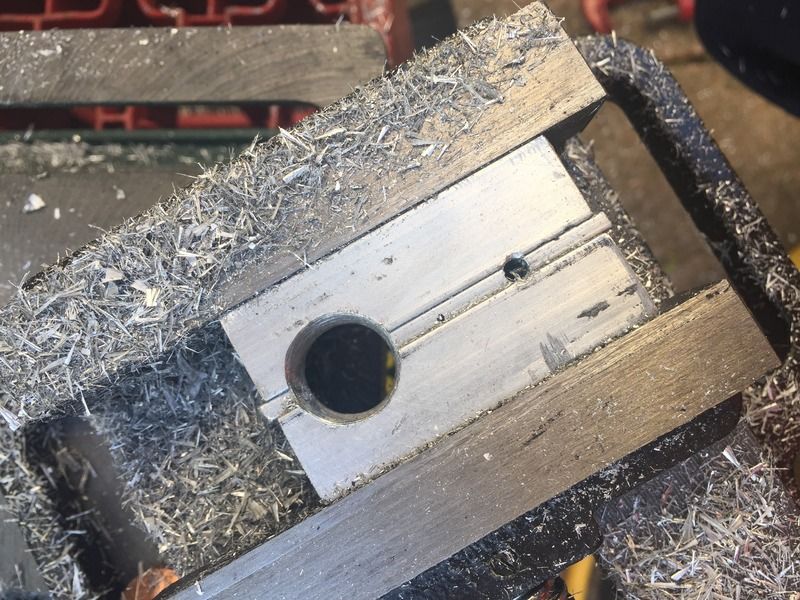
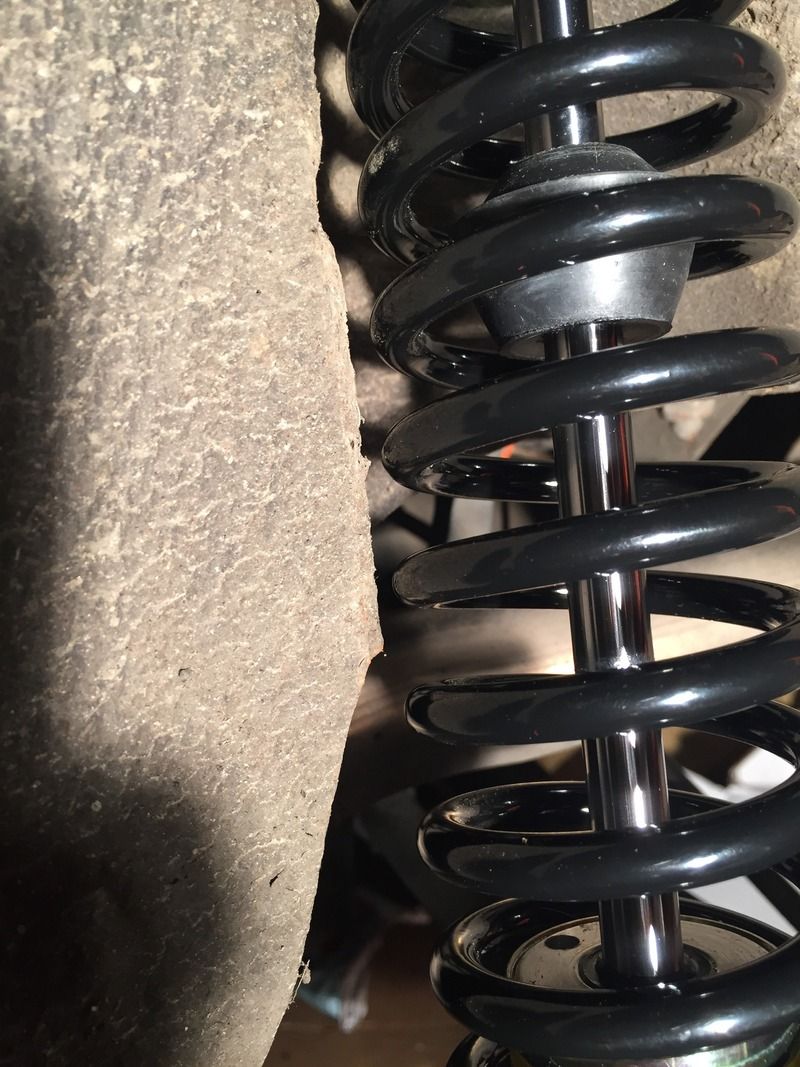
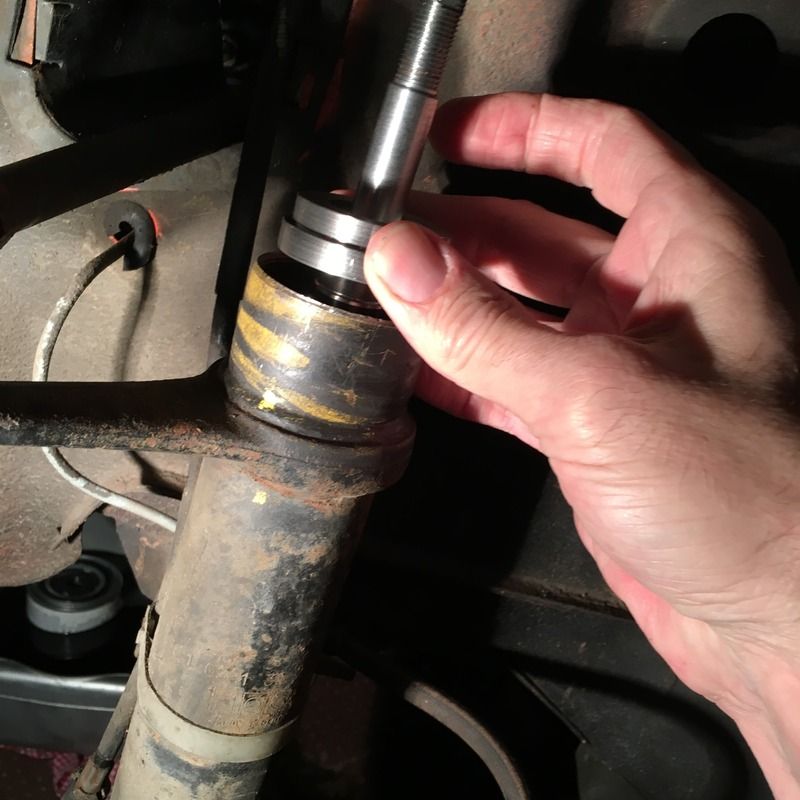
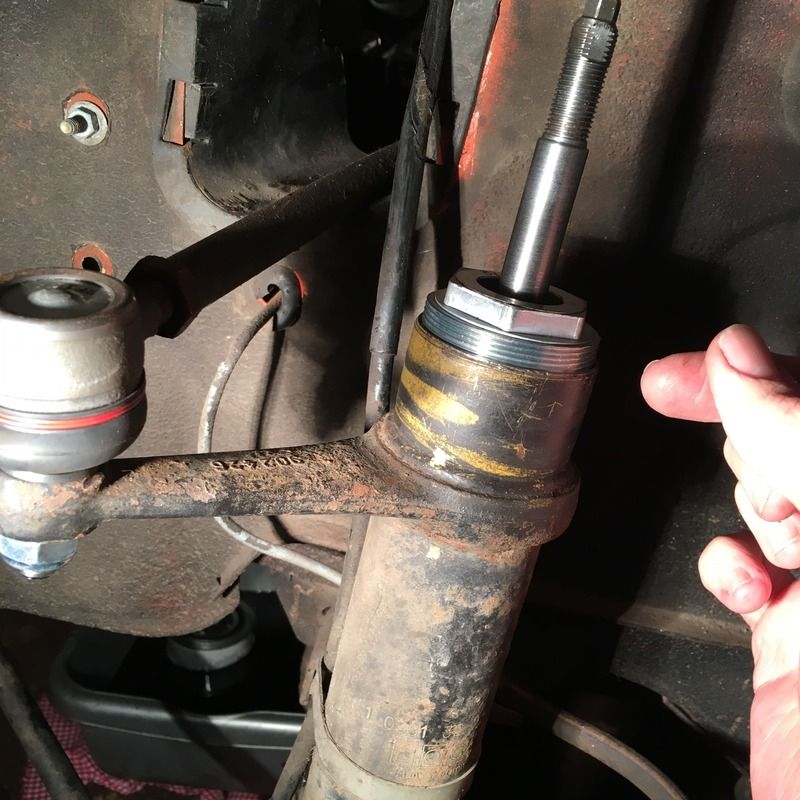
The front suspension lowering threw up another issue last week while trying different ride heights. Andy, my Dutch rally Daf contact commented on a picture I posted on Facebook showing the top mount blocks that I had made to raise the top of the shock absorbers up above the body to stop the shocks bottoming out. He was worried that the top mount was no longer supported by the body to stop it moving from side to side and that using much longer M8 mounting bolts than standard with them made the problem worse ands possibly dangerous! To solve this I have had the alloy top mounts drilled out to accept a 64mm steel sleeve 7mm into them that will also locate the spacers into the hole in the bodywork properly:
The fancy gas shock absorbers fitted great with their special stainless spacers, I will be passing on details of these to Classic Swede to get some made up for anyone else who wants to fit these dampers:
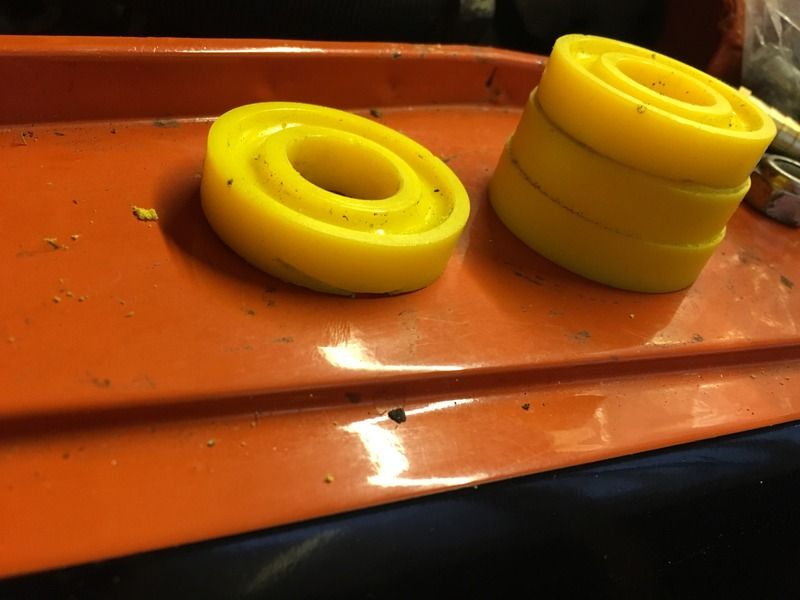
I made some small bumpstops from some poly ones:
Top mount trial fitting:
This is how low I would like to run it but it's about 1" too low, lower suspension arm angles and bump stops get in the way!
|
|
|
|
Post by swissdave on May 7, 2016 19:55:14 GMT
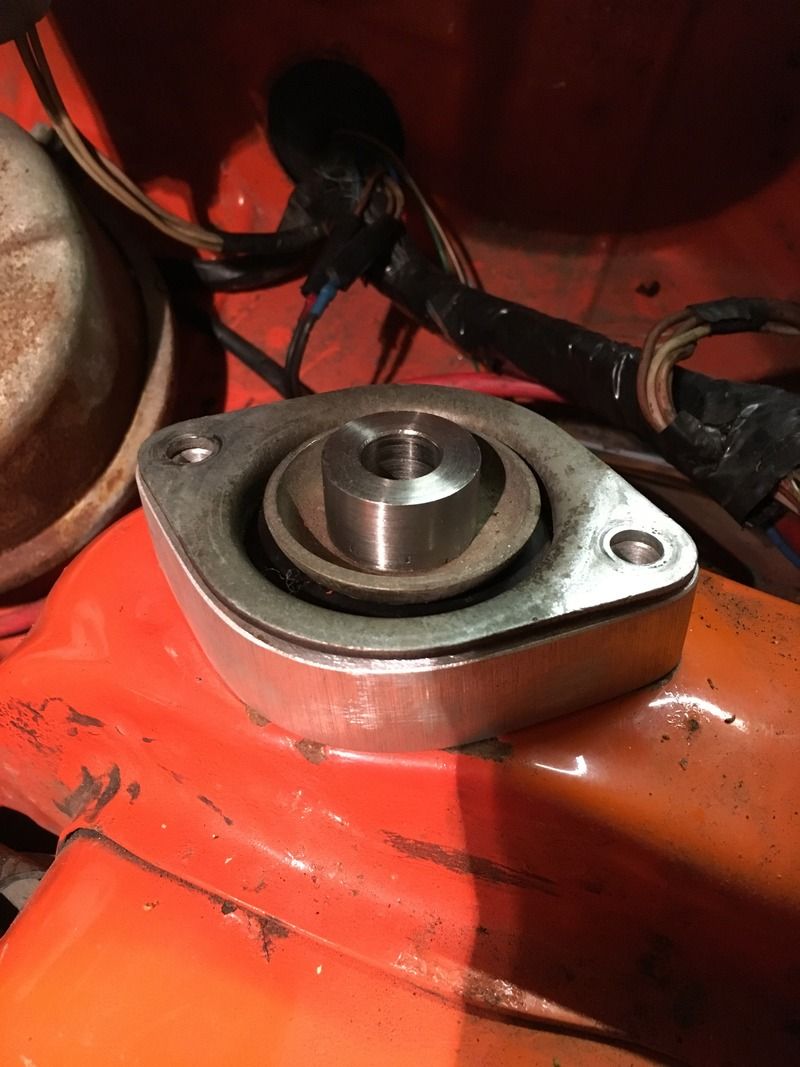
Gordon emerged from the garage today under his own power after a 7 month rest. The suspension is all finished, subject to adjusting the front ride height after a test drive. There was another small thing to mention with regards to the top mount spacers, I had to trim the bottom protruding edge of the Volvo mounts so that they would fit into the tube now fitted into the spacers. These are a different style to the Daf type which are mostly rubber but would fit ok if trimmed, I only know this because I got some Daf ones from ED a while back and noticed that they were different to my V66 ones. Before on the left;  Fits in like this; 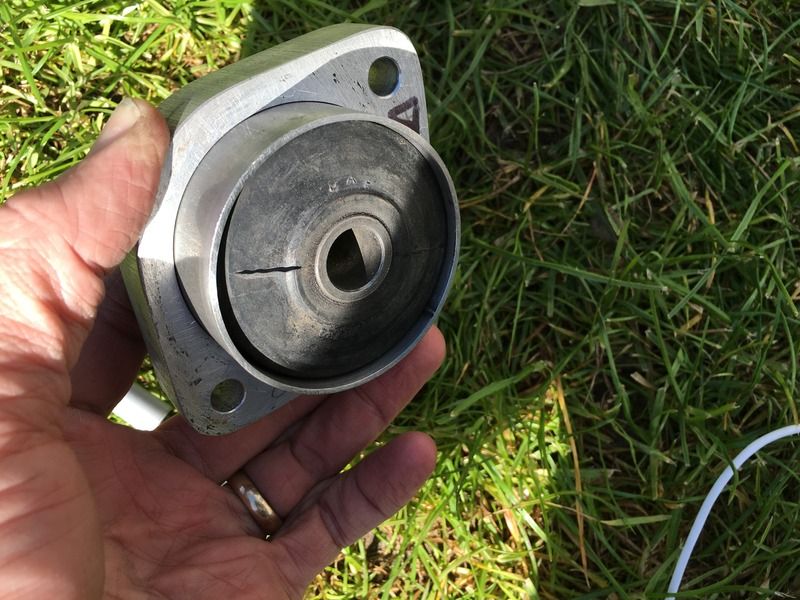 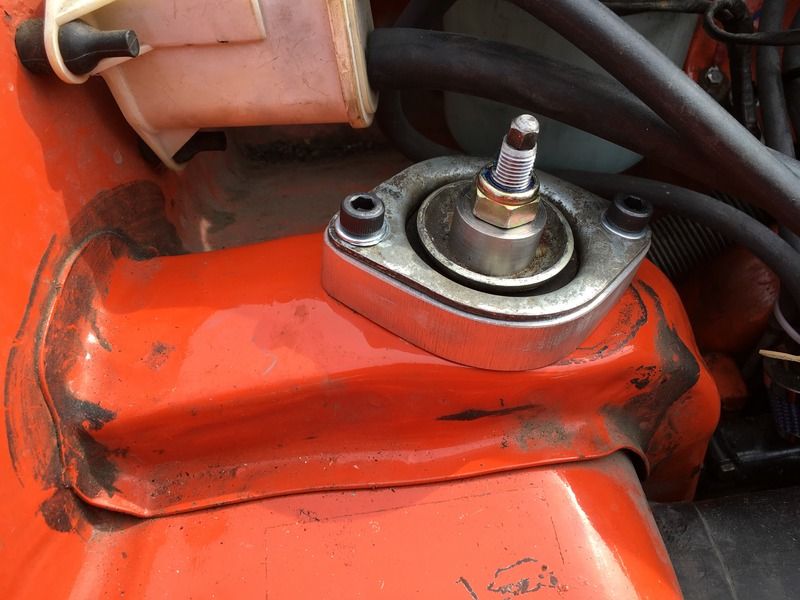 There were also another few upgrades fitted today, including.. 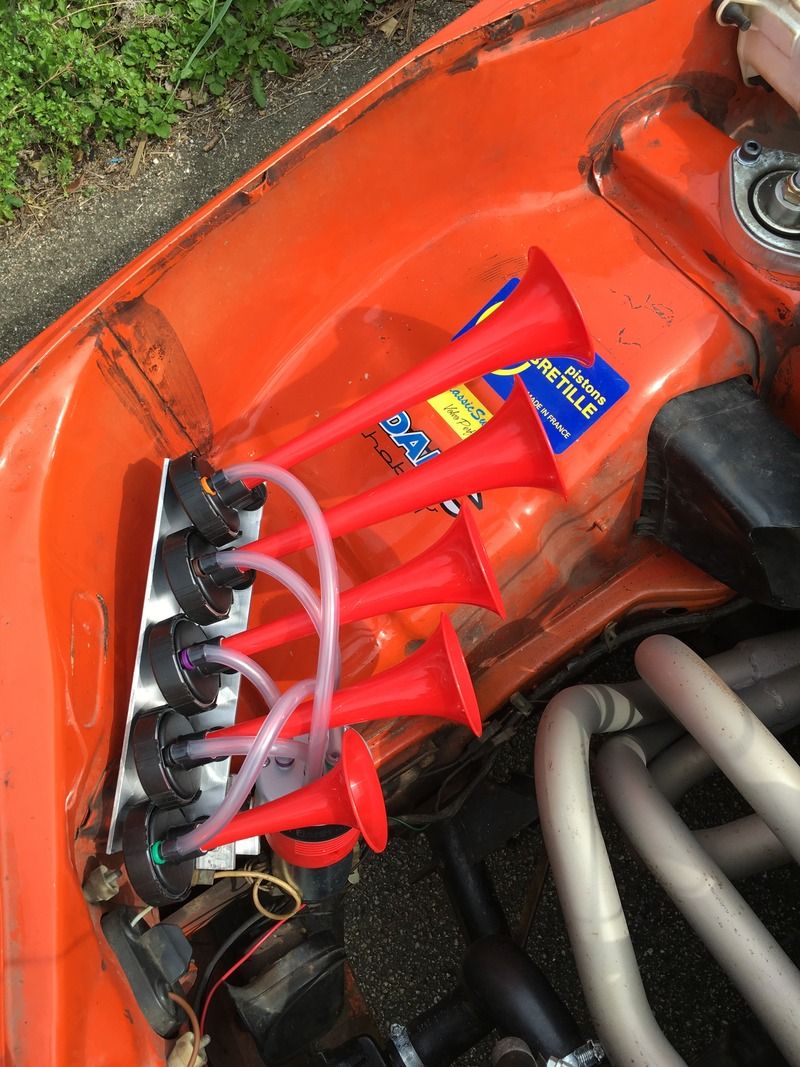  |
|
|
|
Post by swissdave on May 9, 2016 19:06:06 GMT
MOT time today and I'm pleased to say that we are legal for another year. Even after checking everything at least twice before the test and despite having spent a lot of time and effort fitting new parts over the winter I was still nervous waiting for the result. No advisories but the emissions although within limits were slightly fruity, the engine is back on the single weber 32 and I had suspected that the idle jets were a bit large when I used it like this last year. The guy at the rolling road had increased the idle jets along with the accelerator pump jet to try to solve an annoying light throttle misfire at cruise, it had worked somewhat but the car was still a bit "fluffy" coming off of cruise to accelerate. Once I'd come back from Holland I realised my mistake which had caused the problem and after plumbing in the cooling system to the inlet manifold to heat the manifold as it was designed to be the car ran super smooth! I guess the idle jets are a now bit too big, I will break out the micro drills and soldering iron soon and reduce both back to where I had them before, 10% over standard R5 Gordini to compensate for the air filter and exhaust. At the MOT station 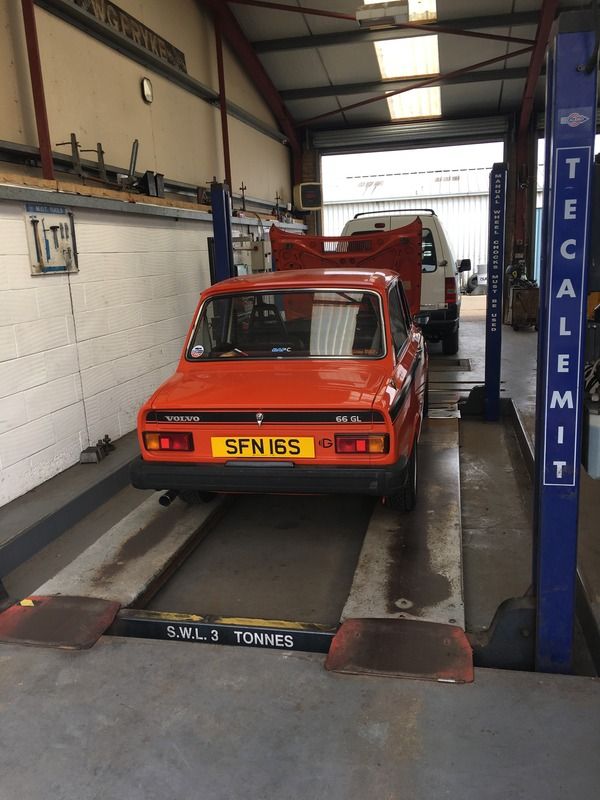 The supercharger upgrade, for those that have been following the other thread, is on hold until I can do it properly with fuel injection and an engine management system. The engine has still had a couple of extras, an electric fan: 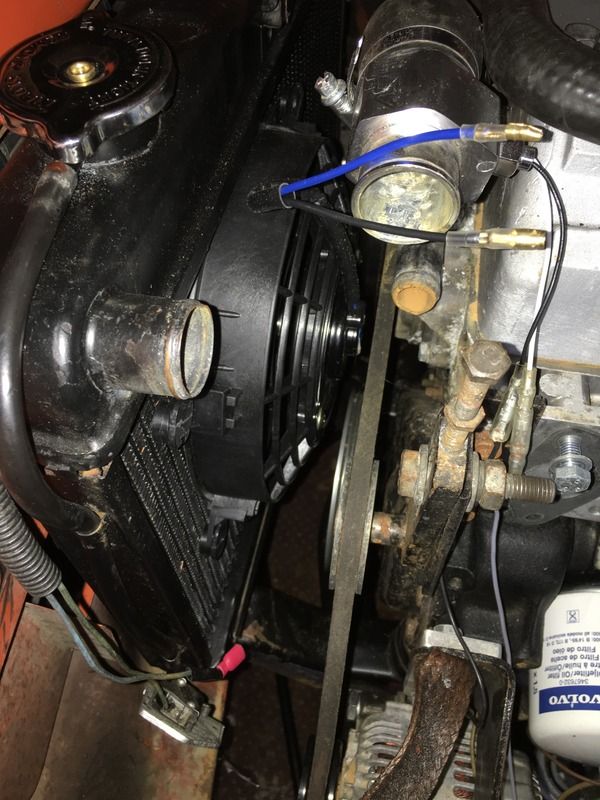 And a better oil breather/separator system. These are less than £20 on eBay and work well, 3 outlets, 2 the size of my outlet on the rocker cover the top of which connects to a hose into the air filter, the 3rd is smaller and low down and I will use as a drain for when enough oil collects in the pot; 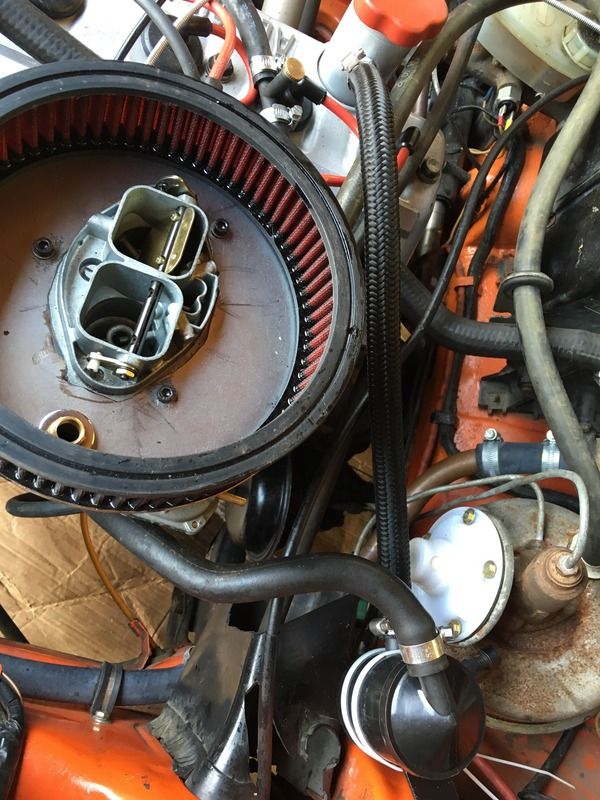  The only other big change was the doubled up front anti roll bar, I meant to get a pic when it was up on the ramp but forgot, you can sort of make it out from this: 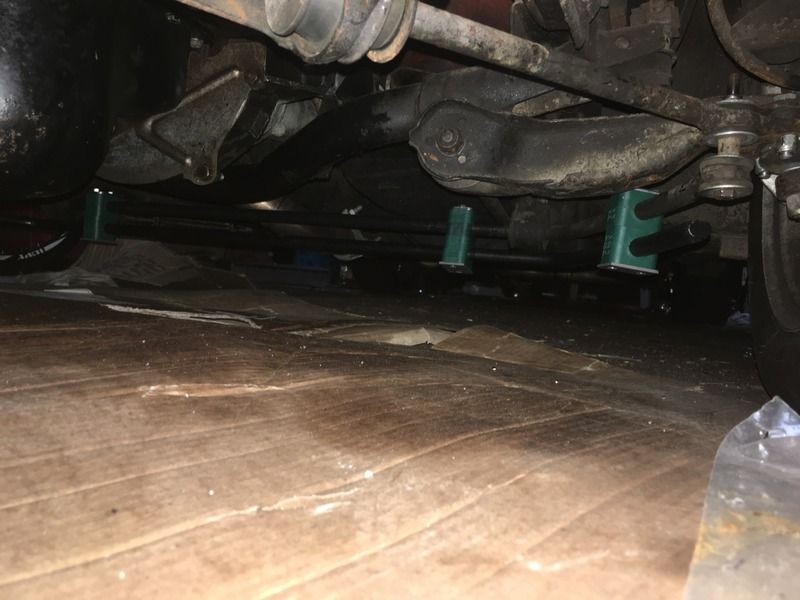 So far the new suspension feels fantastic but I've only managed a few miles, I will report back! |
|
|
|
Post by swissdave on May 19, 2016 18:19:12 GMT
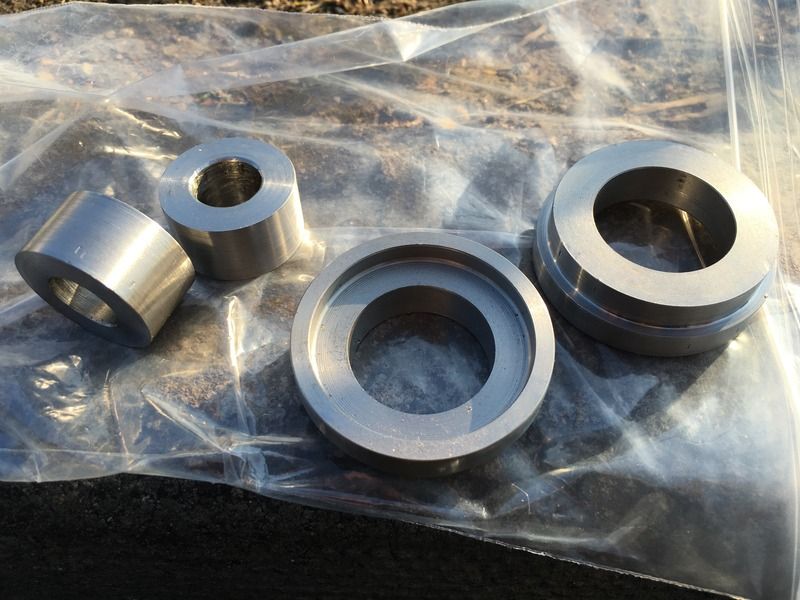
After a good few blasts in Gordon around Suffolk's roads this week I am super pleased with the way he handles now, very sporty :-) 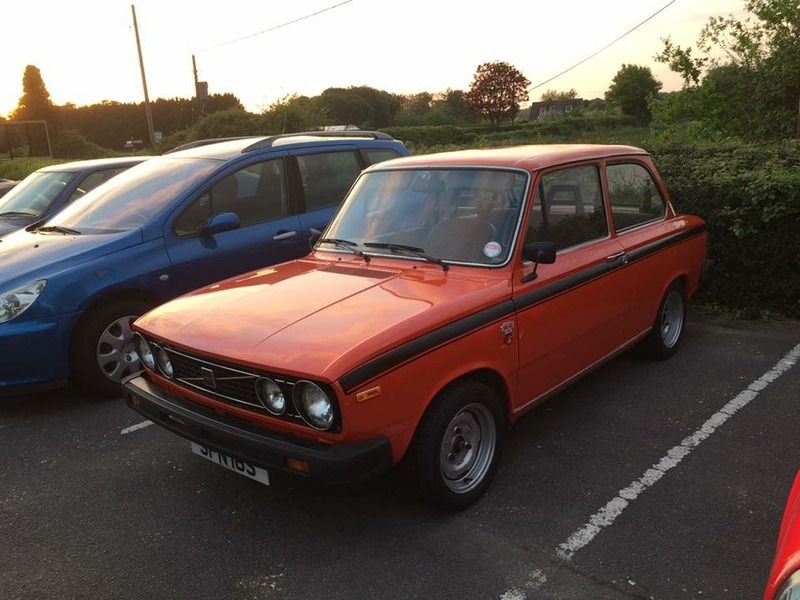 After trying different ride heights the front is now at optimum height, about 2" lower than standard and the turn-in to corners is fantastic, very quick in and he feels keen to get around the bend. There is MUCH less body roll than before and this really helps the feel, the steering is also now lighter which I can't quite explain.. The ride is very slightly stiffer but not hard, it actually feels more comfortable with less pitching and bouncing than before, I must point out that the suspension though standard before was all new and in perfect working order. The measurements for the shock absorber spacers that I had made to fit the GAZ shocks into the Daf struts is below for anyone else wanting to fit some of these as supplied by classicswede, a rough drawing I'm afraid but the measurements are spot on, they are a nice tight fit. 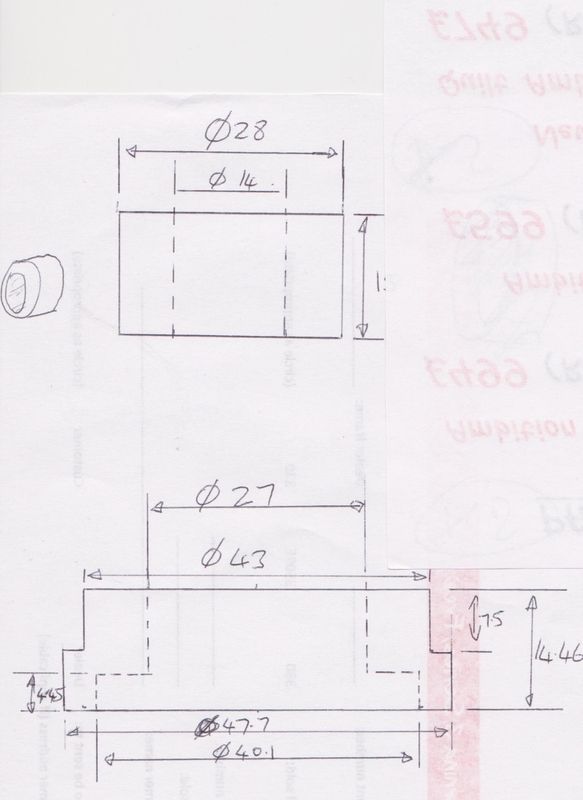 |
|
|
|
Post by swissdave on Jul 4, 2016 10:42:05 GMT
Over the past few weeks the little car has been very busy in a varied selection of roles including family transport to the seaside and taking the kids to swimming clubs and the like when the modern broke down again. I also attended a large local car show where the car received lots of interest and yesterday I took it drag racing at Santa Pod raceway, all completed with no fuss or drama. Some pictures below; 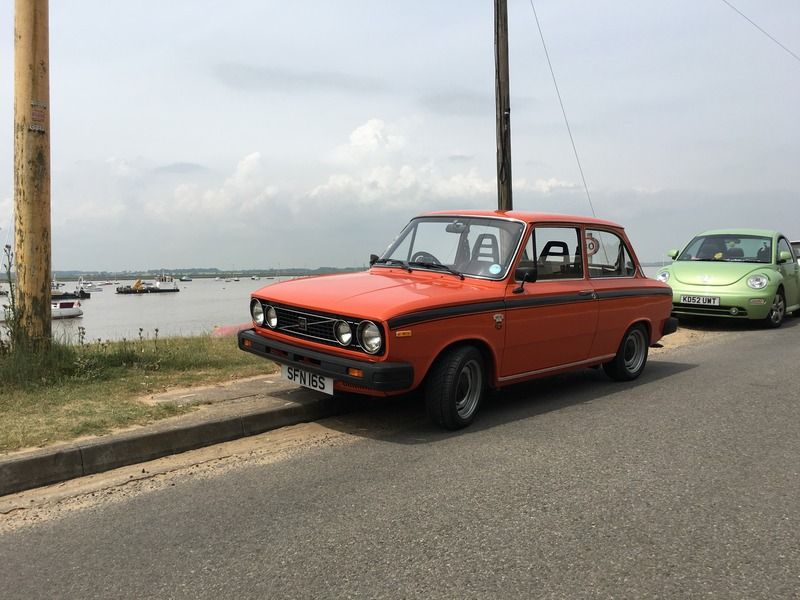   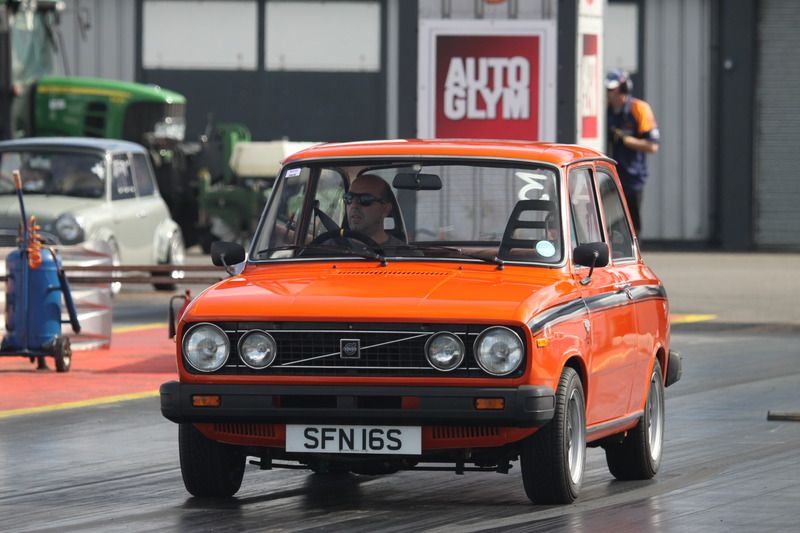 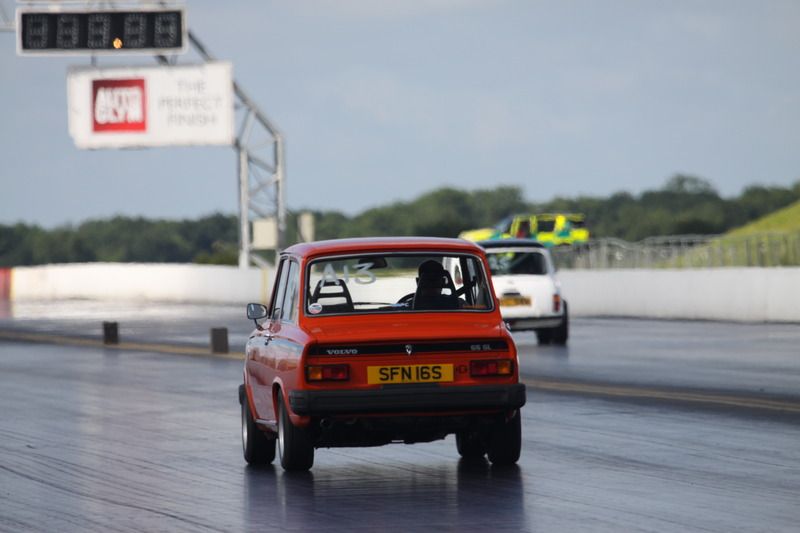 My reaction times were shocking, the best of three attempts saw an 18.7. This is about 3 seconds faster than standard but if I could keep the revs higher I reckon there's another second to come off that time, I am planning an extra electric vacuum pump for that purpose, watch this space! |
|
|
|
Post by swissdave on Jul 9, 2016 12:17:51 GMT
I have researched 12 volt vacuum pumps and have found one that is commonly used on electric car conversions. They are designed for the braking system when there is no conventional engine to generate vacuum in the inlet manifold. Swiss made with an internal regulator switch they are a stand alone item that require no maintenance and are also very quiet, the detailed specs are below: 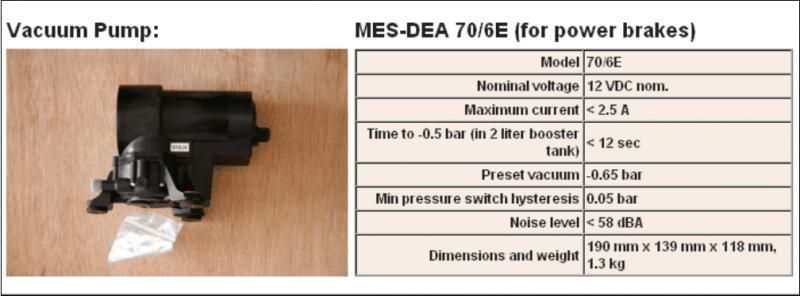 I have removed the vacuum pipe from the inlet manifold and plumbed it into the new pump that I have fitted in the front corner of the engine bay, the vacuum feeds three ways on the Volvo, 1 to the brake servo, 1 to the EMVK valve for the gearbox and 1 to the clutch servo. This extra pump will provide a strong vacuum, at least as strong as the engine can produce in the inlet manifold in ideal conditions, small throttle openings and high revs, at all times. This should make using the hill descent button combined with my change-up over ride switch much more effective, holding the ratio lower for more revs and power. We tested the pump last night and it operates for a few seconds then shuts off when the system is at the correct vacuum and all of the parts of the Vario are vacuum tight and seem to work ok. 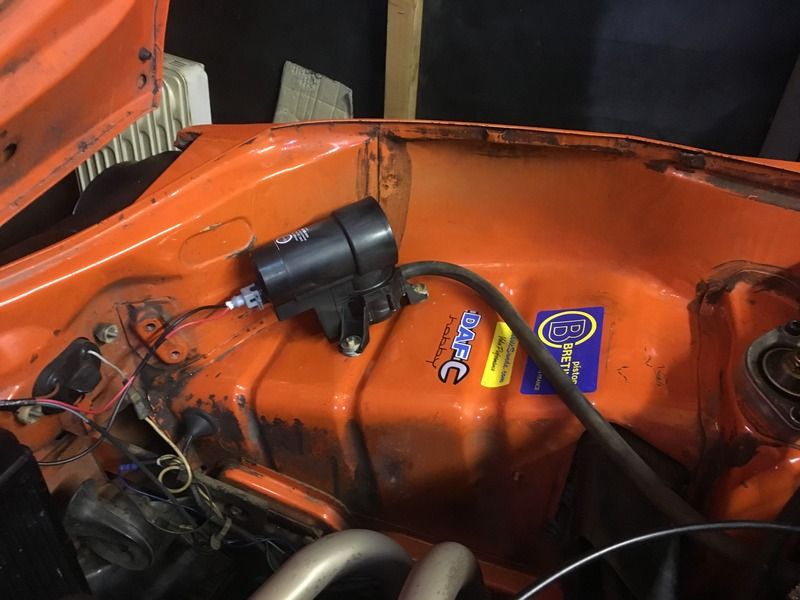 I haven't test driven it yet, it seems that I spoke too soon about the lack of incident at the weekend as the alternator bracket that I made has snapped leaving the alternator secured only by the adjustment arm, the bracket is away being re-welded and strengthened. |
|
|
|
Post by swissdave on Jul 20, 2016 19:10:31 GMT
I have a free weekend, Swissdave jnr and I are off to try Gordon on the 1/4 mile again, this time with the new vacuum pump switched on. The new pump should make the clutch servo more effective allowing higher revs for initial clutch bite giving a quicker get away and also enable the combined hill descent switch and change up disabling switch I've fitted to hold the ratio much lower to make the engine rev higher. Jnr is a bit handy on the video camera so hopefully I'll have something to show after the weekend. Anything in the low 17s would make me very happy, a standard Renault 5 Gordini, which is where the donor engine is from could do 17.8 according to Autocar back in the day. Anything faster than that with my slack backside at the wheel shows the efficiency of the Daf Variomatic. :-) Santa pod are VW only this weekend so we're off to Stratford for this; www.shakespearecountyraceway.com/eventdetails.asp?event=83 |
|
mattsdafs
Likes DAFs
Yolanda, 55 estate
Posts: 374
|
Post by mattsdafs on Jul 20, 2016 19:53:50 GMT
Good luck Steve..show them what a Daf can do  |
|
|
|
Post by joe on Jul 21, 2016 15:24:43 GMT
Your work is absolutely stunning! An art form! And so inspirational! You've even got me thinking about something I've had in my head for years, A BMW Motorbike Engined Daf. Air-Cooled Twin Cylinder Boxer purity with modern performance! People do it with 2CV's so I'm sure it's workable. One day I might attempt it, one day!   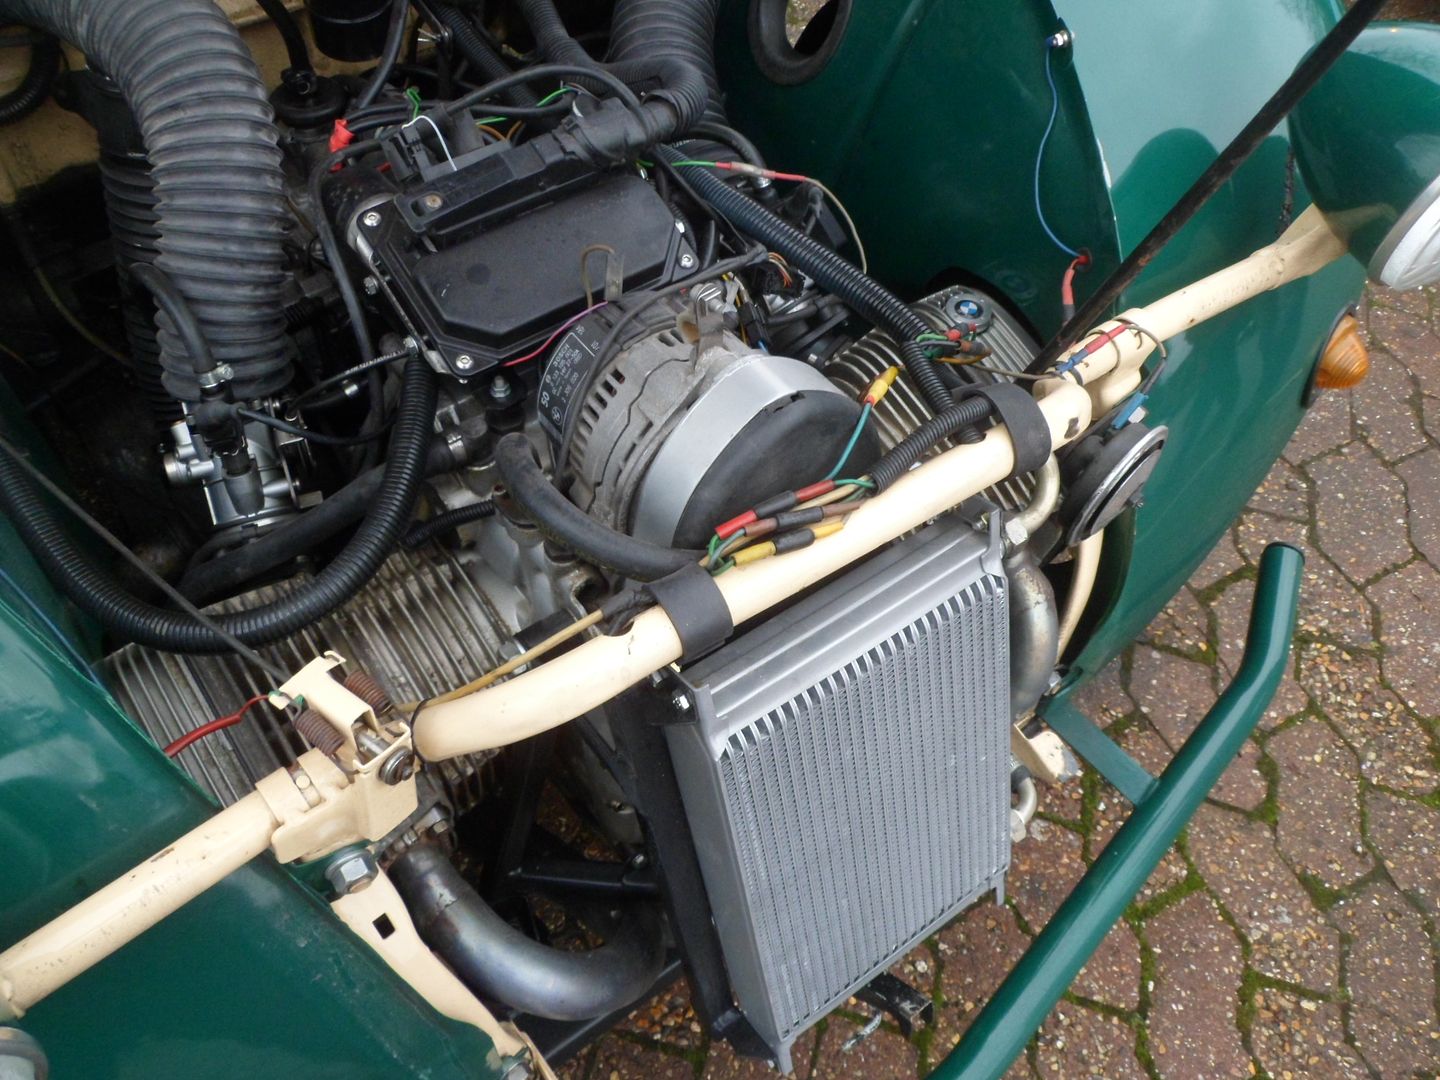 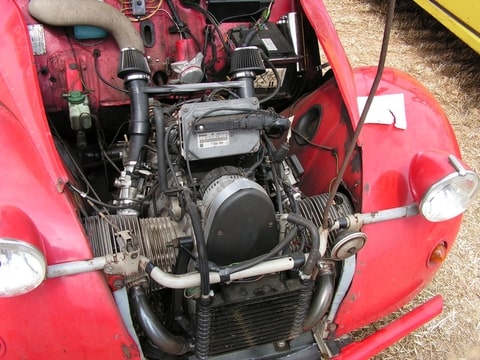 |
|
|
|
Post by swissdave on Jul 21, 2016 21:36:48 GMT
I like your thinking! I had a R1200S recently, a lovely bike and that engine makes 122 bhp, loads of midrange and is as smooth as silk.
I do think that little low-compression 850cc Daf twin is crying out for some forced induction though, Nick and I have discussed it at length.
The very similar VW 4 cylinder design stands it ok and it's a common modification, a little AMR 300 or 500 would do the job nicely.;-)
|
|
|
|
Post by swissdave on Jul 24, 2016 19:13:18 GMT
Well, it was very hot on Saturday and the 120 mile journey to Stratford was plagued by traffic jams and took over 3 hours! All the family came along and while we were moving all was well but the little car was getting a little hot under the collar, after a fast run then having to crawl in stop start traffic always shows any weakness and although I didn't lose any coolant I think I need a larger electric fan or a better radiator for the handful of really hot days we have in the summer. As we got there so late I only managed two runs but I am pleased to say I did manage a 17.9 on the first run. The next run was an almost identical time albeit with a better launch but I left the hill descent button on too long and ran out of revs just before the end of the 1/4. It seems that just after 60mph at 6500rpm is the sweet spot to switch it off, the Vario then adjusts and the revs drop to about 5800 and the car then keeps accelerating. Anyway, jnr managed a video albeit a bit shakey of my first run, you can see it's quite sharp off the line now, the screeching tyres weren't me though, the American muscle car next to me just disappeared lol! The video should appear below this; 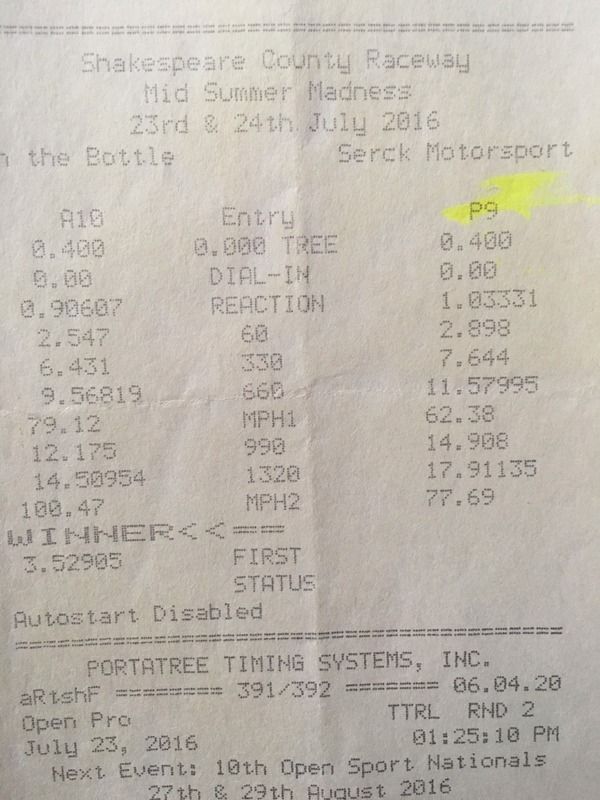 |
|
|
|
Post by swissdave on Aug 8, 2016 10:15:37 GMT
Family holiday time and the new towbar and trailer proved handy, we had a large tent, all the bedding, 4 wooden garden chairs and a table squeezed into the trailer and the kid's bikes on top. The trailer tyres were cracked and looked very old when I bought it so I changed them for a cheap pair off eBay which amused me as they were labelled as "high speed" trailer tyres, perfect! Several hundred miles covered and all went well, we're back now and the trailer is into storage until next year. 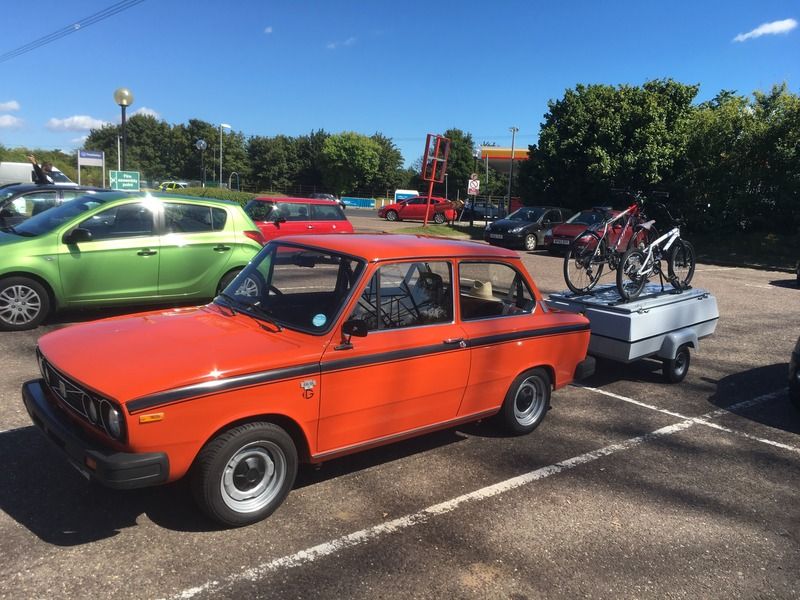 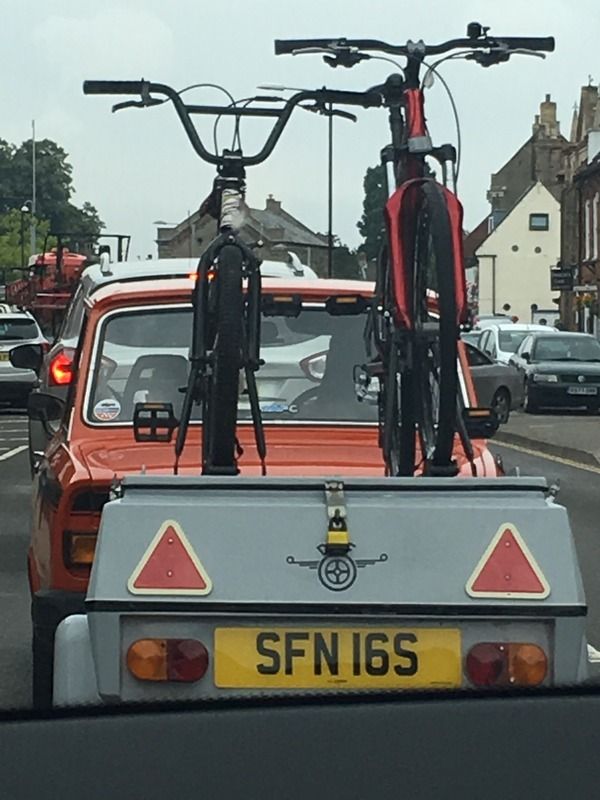  |
|
|
|
Post by swissdave on Oct 27, 2016 18:46:30 GMT
It's that time of year again and the little car is tucked away for a nice winter break, plans for the next few months include finishing the supercharger conversion, the Gordini engine thread will have details of this soon, fitting an oil cooler, a radiator expansion tank, a larger electric fan and an electric fuel pump. A boost gauge and a wideband AFR (air fuel ratio) gauge will also go into the centre console. In the meantime though I have found the answer to next year's family holidays in the form of a classic 4 berth caravan that weighs a mere 540kg. It's a 1965 French Star Starlite and it's very original having spent most of its life in a barn. Gordon pulled this along easily, I towed it home to Suffolk from Derby without issue although he did use a vast amount of petrol. Well, I say petrol but I've been using a mix of 80% unleaded and 20% toluene to see how the engine likes it. When the supercharger is fitted I will be using this mix as a knock-suppressant to allow me to keep a lot of ignition advance and make the most of the low boost that the engine will have. The F1 teams used an 85% toluene mix in the '80s turbo era to make up to 1500 BHP from only 1500cc engines using massive amounts of boost from turbochargers. Here's the caravan; 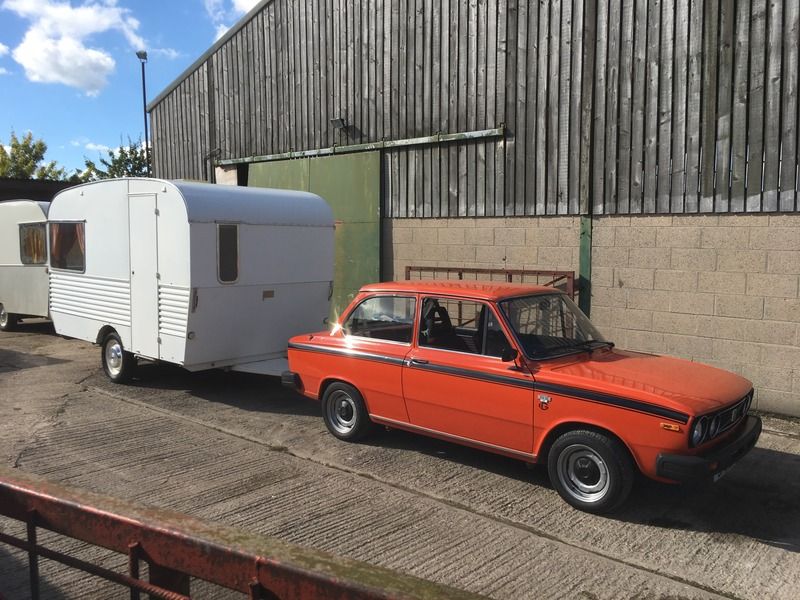 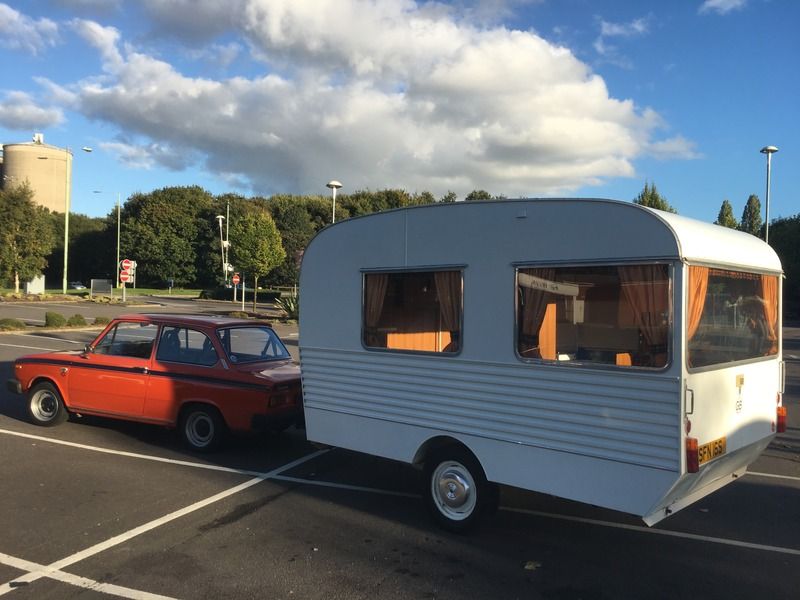 |
|
|
|
Post by Richard DAF Webmeister on Oct 27, 2016 19:19:59 GMT
That caravan looks absolutely super - just right for the car, complete with matching curtains!
I may well "borrow" the story for the next mag, due out in December...
|
|
|
|
Post by swissdave on Nov 28, 2016 17:52:58 GMT
The winter upgrades are coming along well if a little slowly. The Gaz rear shock absorbers with the coil springs fitted that I got from Dai at Classic Swede have worked well since I put them on at the start of the year but I was never completely happy with the setup. When I first tried them with the supplied 80lb springs, despite the lowering blocks the suspension sat too high. I tried some light helper springs to allow a little suspension compression before the main spring started to give effect and although the car sat better and rode nicely the two springs on each damper rattling against each other drove me mad! When I went to pick up the caravan recently I decided to remove the helper springs and go back to just the standard 80lb ones. The low rear of the car had made my small trailer sit at a slight nose down angle when I towed it and I didn't want that with the caravan. As it turned out, the 80 lb springs must have settled a little with use and the ride height was only about 1/2" higher than it had been with the helper springs fitted. The handling on this setup was brilliant around corners but very jiggly with no caravan attached and just me in the car, the simpler spring setup was definitely superior but I needed lighter springs. After a struggle to find any lighter ones anywhere I managed to get some custom 50lb ones made by www.dfaulknersprings.com/ these guys were really helpful it's great to feel that you're talking to a fellow enthusiast. These are now on the car but I won't be able to tell you how they feel until next year when the car is running again. 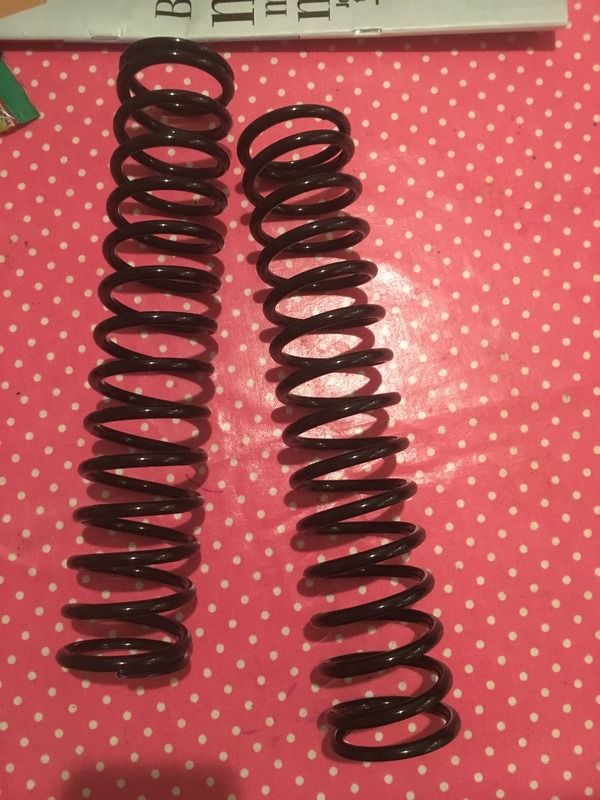 |
|
|
|
Post by swissdave on Feb 20, 2017 12:15:47 GMT
The car itself is nearly ready despite still being without an engine! I am waiting on the return of various parts from the machinist before I can build up the engine in it's new spec and fit it. The expansion tank for the radiator came from an early Land Rover and has been fitted by the electric fuel pump on the nearside of the engine bay. The expansion tank will use a 7lb radiator cap with a blank cap on the radiator. 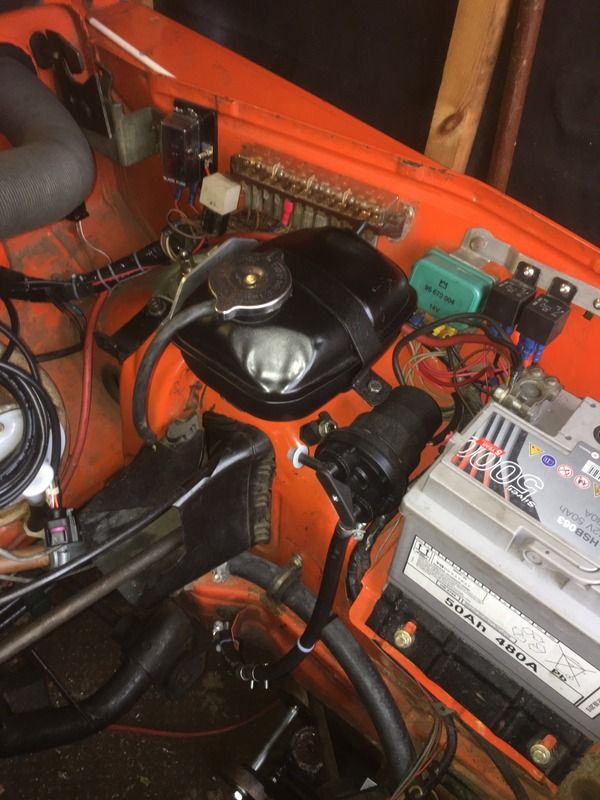 The new electric fuel pump has an inertia switch wired into the power supply, in the event of a crash or the car turning over the inertia switch will kill the pump so that fuel isn't being pumped into the carb, the fuel pump normally switches on and off with the ignition. 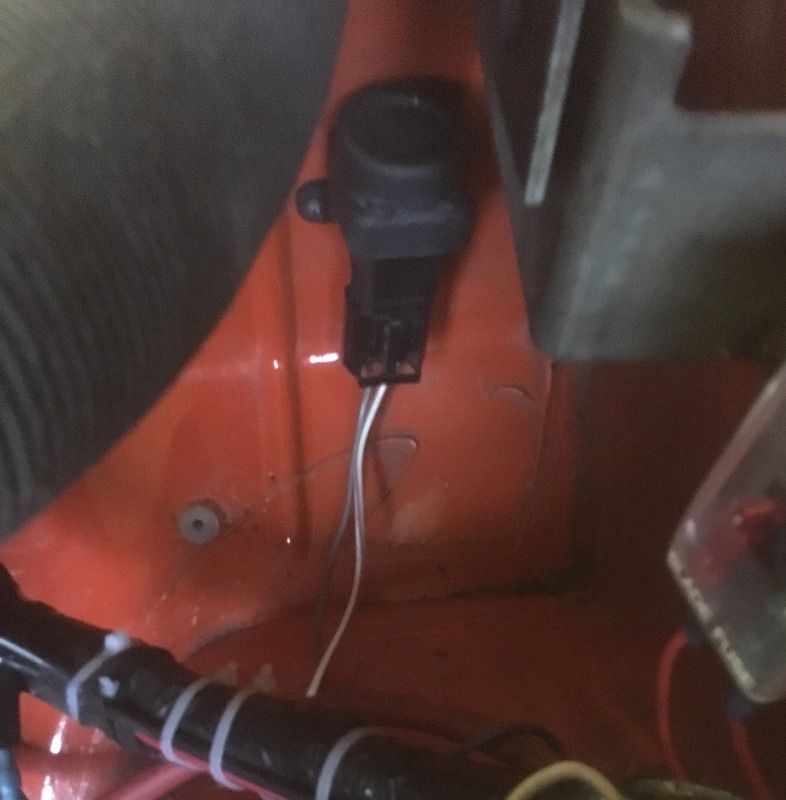 The oil cooler fitted neatly into one of the slots in the Volvo bumper and will be fed by a thermostatic sandwich plate below the oil filter on the engine. 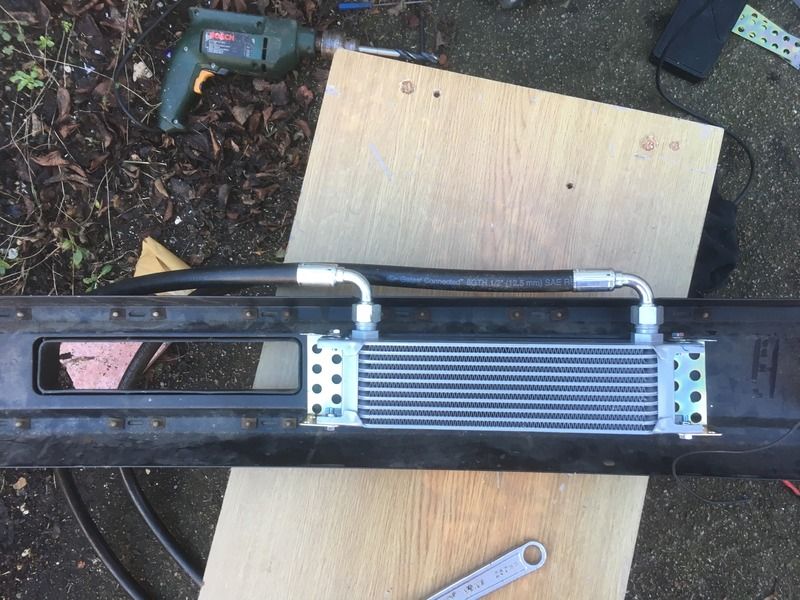  The exhaust manifold has a boss welded in for the wide band lambda sensor and the Air Fuel Ratio gauge is fitted into the centre console but I haven't any photos of that yet. ;-) More news soon hopefully! |
|
|
|
Post by swissdave on Jul 20, 2017 12:01:57 GMT
Well, thank you Photobucket for ruining all of my car blogs on the internet! As some of you may know Photobucket is a free hosting site for photos that can then be shared to forums etc. I have had a free account with Photobucket for over a decade which I've used to host images. A little over two weeks ago Photobucket changed the their Term of Service. This resulted in those with a free account being required to upgrade to their most expensive account ($399. per year) in order to be able to post third party images hosted at their website. This is why you see that message "Please Update Your Account To Enable 3rd Party Hosting" everywhere a pic should be. All of my images have been restricted and or deleted. I apologize for any inconvenience this situation may have caused but I am not prepared to be blackmailed. I'm afraid that I don't have the time or energy to alter every post I've made to put the pictures back up with another host so have decided to just continue this thread using Imgur as the host for future pictures. This is a test but also a hint at the next direction for my Gordini engine, does this photo work ok for everyone else? Regards, Steve.  |
|
|
|
Post by andrejuan on Jul 20, 2017 13:30:14 GMT
Yes that works fine, I too have been using P/B and decided to remove all my pics. Mind you they don't make that quick or easy to do.
Mine was a free account apart from me paying to be ad. free. The search is now on for a suitable alternative, hopefully the forum programmers
(or whatever the creators are called) will make it easier to upload pictures to threads.
|
|
|
|
Post by triumph66 on Jul 20, 2017 20:12:38 GMT
Yes I can see it too. Thank God I don't have to mess around with my account settings to see those deleted photos.!
|
|
|
|
Post by swissdave on Aug 3, 2017 18:31:59 GMT
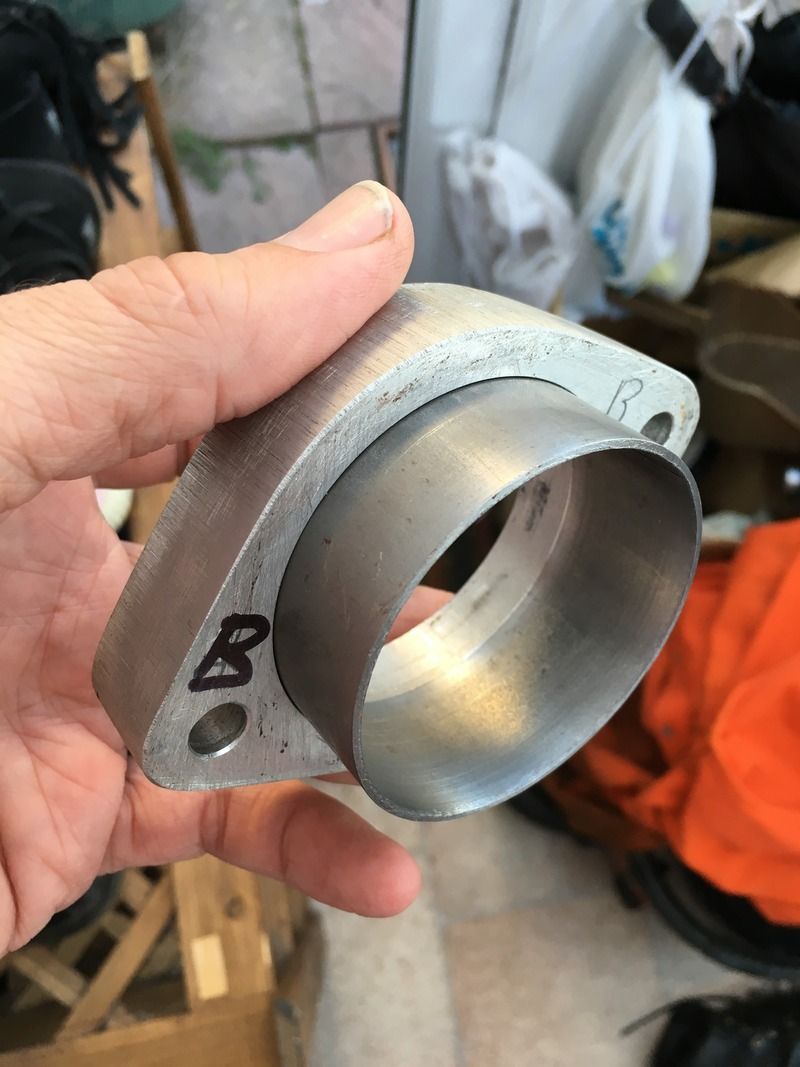
The next effort with the engine after the stillborn supercharger project is to add the turbo system, carb and all from a Renault 5 Gordini Turbo. An original new turbo and a used carb with all the necessary gubbins came up at a very reasonable price and I will use them with a custom stainless manifold. This is being made at the moment, it will mount the turbo high up at the front of the engine bay as you can see from the picture of the flange positioned on the original 4 branch as a guide for the new one. The flange for the engine end of the manifold was cut from 8mm stainless.  [br  |
|