|
|
Post by swissdave on Aug 14, 2017 20:28:35 GMT
 As you can see the manifold has turned out rather well. I need to sort out the oil supply and return to the turbo next and then it's back to the exhaust genius for the dump pipe to the exhaust and an inlet pipe to cross over the cylinder head from the turbo to the original inlet manifold. I have a temperature sensor for the inlet and I need to drill and tap the manifold to accept this. ![]()
|
|
|
|
Post by swissdave on Oct 20, 2017 15:30:55 GMT
Nearly ready to try the new turbo engine, the oil supply and return are done, I have had a pipe made to supply the charge to the original inlet manifold from the turbocharger outlet and I have started planning the routing of the coolant system to feed the carb plenum that fits before the turbo, it will be fed from the heater supply pipe and return into the bypass hose before the water pump. Attachments:

|
|
|
|
Post by triumph66 on Oct 20, 2017 17:37:38 GMT
Look forward to seeing a video of the car in action.
|
|
|
|
Post by jackytwoshoes on Nov 12, 2017 19:24:33 GMT
Amazing! I would love to see this in action.
How does the turbo affect the vacuum required for overdrive etc?
|
|
|
|
Post by swissdave on Nov 13, 2017 19:19:25 GMT
Amazing! I would love to see this in action. How does the turbo affect the vacuum required for overdrive etc? Hi there! I recently fitted a 12v vacuum pump to the car and that regulates itself and holds a slightly higher vacuum than the standard inlet manifold supply would. This supplies the vario, the brake servo and the clutch servo fitted on the V66 with vacuum and works well, the extra vacuum increasing the effect of all three systems. With this type of turbo install where the turbo is after the carb and sucks through it the plenum under the carb only ever sees vacuum so the standard setup would work fine anyway if plumbed into that but the original vacuum take off on the inlet manifold wouldn't work as that's after the turbo and sees boost. |
|
|
|
Post by swissdave on Dec 7, 2017 15:09:57 GMT
With so many extra bits and pieces in the engine bay I have started working on heat management using some heat reflective tape on various coolant hoses and a couple of thin stainless heat shields I'm working on. Attachment DeletedI'm told that the weak point on the 66 drivetrain is the propshaft if running more power than standard so I took a trip to Essex Dafs last Sunday and collected a couple of spare ones from Matt just in case. Attachment Deleted |
|
|
|
Post by swissdave on Dec 22, 2017 12:11:44 GMT
The cooling system is now finished, the alloy radiator fitted in well and I hope that along with the bumper mounted oil cooler this will prevent any further cooling issues.
The inlet and fuel system is also all ready now and the carb is fitted. I managed to find a NOS Weber from Italy as it turned out that the used carb that came with the turbo kit wasn't the correct Gordini Turbo spec one. I am using a fuel pressure regulator after the electric fuel pump and the pump itself has an inertia switch fitted in the power supply so that the fuel pump cuts out in the event of a crash or if the car turns over.
Jobs still to do include making a mounting bracket for the variomatic throttle switch on the carb and re-routing the drivers side headlight wiring away from the turbo manifold but I'm nearly there.
The car is now booked in with the exhaust guy at the end of January to have the pipe made to connect the turbo outlet to the exhaust system which should be the last bit. In the meantime I need to get the engine started and running well enough to get the car back up my (very steep) driveway when it comes home from the exhaust fitting.
Fingers crossed.
|
|
|
|
Post by swissdave on Feb 23, 2018 12:59:07 GMT
Gordon's alive! The exhaust genius has made the downpipe to link the turbo to the Classic Swede exhaust. The new link pipe has a flexi section in it just before it joins the exhaust which has allowed me to add another mounting point to the exhaust near the front as well as the standard two at the back. The bung is for a lambda sensor which will be wired up to a wide band AFR gauge, this will give constant live readings of the air fuel ratio in the exhaust on a simple in-car dial that uses coloured LEDs to warn of a lean mixture that could damage the engine and will be very useful to help tune the carburettor. I have fitted a temperature sensor into the inlet manifold so I can see if the intake charge is getting too hot and as a final level of protection for the new engine I will be fitting my Christmas pressie, a stand alone knock sensor. If the engine starts to pink or even worse knock the Knocklink LED lets you know, it flashes red. Without a visual warning like this an engine can be wrecked in a matter of seconds as you are unlikely to hear it in time, knocking is caused by the mixture exploding too soon in the chamber through being too hot or too lean and can blow head gaskets or even hole pistons. The car now moves under it's own steam, after a bit of tinkering last night it will idle if a little roughly and will soon be off to the rolling road guy for a proper setup. There are still a few last bits to do, wiring the gauges and fitting the strut brace to the front suspension but it's nearly ready to put back on the road for the first time since October 2016, I can't wait! New Exhaust, Knocklink in bottom pic: Attachments:
|
|
|
|
Post by jackytwoshoes on Feb 23, 2018 13:12:22 GMT
Looks brilliant!
You, sir, are living the dream.
|
|
|
|
Post by swissdave on Feb 24, 2018 19:10:26 GMT
Looks brilliant! You, sir, are living the dream. Thank you! I am really enjoying being able to build something like this. The Gordini/Turbo conversion is something I thought of 20 odd years ago when I had my first Daf but at the time a tired old 66 was my daily, not a toy in the garage. I couldn’t have even considered it without the help of my friendly local welding/fabrication specialist Paul Gooderham. He has a soft spot for the car and his design input has really made it possible. www.paulgooderham.co.uk/ |
|
|
|
Post by swissdave on Apr 5, 2018 13:16:51 GMT
As I want to get some miles on the new engine I bit the bullet and called the insurance company today to get some cover.
I always use Adrian Flux for my classic cars and motorbikes I’ve had I have always found them reasonable and they didn’t disappoint this time.
Only £164 for a 12 month limited mileage (5k) fully comp policy even with the turbo, modded suspension etc all declared!
I am a very happy bunny, I hope to be out and about in Gordon at the weekend.
|
|
|
|
Post by jackytwoshoes on Apr 5, 2018 14:27:49 GMT
Great! Would love to see some videos of it in action.
|
|
|
|
Post by swissdave on May 14, 2018 11:27:26 GMT
Electrical issues have caused a fair bit of hassle over the last few weeks and they have stopped me doing much else. Work has also been super busy robbing me of spare Daffing time. The part of the wiring loom that feeds the front right of the car needed changing as it normally runs along the chassis rail, right next to the turbo and it's downpipe. I have replaced all of this and run it through some conduit and then a heat proof sleeve. This is then also protected by a small stainless heatshield at it's closest point to the turbo. I hate wiring anyway, it's always my least favorite part of a build like this and this time again it didn't go to plan. After spending ages carefully extending the loom I had a wierd problem with the indicator repeater coming on with the sidelights. After a lot of mucking about it turned out to be the repeater's bulb holder breaking down internally causing a short to earth. That is now replaced and although I still have one faulty horn and no main beam (faulty relay I think) I am getting closer to getting it right and the other lights and indicators are working. The other recent job has been replacing the track rod ends with Rod End bearings. This is to fix a problem caused by lowering the front suspension. The replacement track rod ends I got from Daf Hobby last year are larger (taller) than the original Daf type and the extra height had caused them to touch the bodywork above them over large bumps. Not a nice sound! The steering arms were also at quite an angle from parallel with the ground and this causes bump steer making the car a bit twitchy over uneven smaller roads. To fit Rod Ends I needed to have some tapered bolts and spacers made and these have allowed a much more sensible steering arm angle and the suspension will now bottom out before anything touches the inner wing.    |
|
|
|
Post by swissdave on May 14, 2018 11:30:00 GMT
|
|
|
|
Post by swissdave on May 16, 2018 12:49:58 GMT
I managed another little spin out yesterday and all went well other than discovering a slight oil leak from the front crankshaft oil seal - again! This is really annoying as I replaced the seal during the latest build and checked the crank pulley seal surface for imperfections as it had been weeping previously. One suggestion I have had is to soak a new seal in oil for 24 hrs before fitting but I wonder if maybe there is a better twin or triple lipped seal out there somewhere? Any ideas welcome, replacing the seal again will involve a fair bit of dismantling again so I'd like to get it right this time. Anyway, a photo of it all complete before I start taking it apart for the umpteenth time!  |
|
|
|
Post by swissdave on Jul 4, 2018 16:08:57 GMT
|
|
|
|
Post by swissdave on Jul 4, 2018 16:24:59 GMT
The turbo experiment ended with the turbo oil seals letting go last week after a few hundred miles, I don’t know why, it was a new old stock one but I had bought it very cheaply on eBay.
I have been testing and tuning the car over the last month and it hadn’t turned out as great as I thought it would. Although it was very fast once the revs were up and the turbo was spinning I could only use 4 psi of boost because of the high compression and even then I got a bit of pinking when it got hot.
The throttle response with my Stone Age carb before turbo setup was also very poor, the vario didn’t want to change down much until the power finally arrived which is a shame as that would have helped the engine to spin up quicker if it had played ball.
I think I had inadvertently built all of the downsides of a turbo install into it without the benefit of a decent chunk of boost to compensate.
I think a better (mappable) ignition system and less compression would work better but for the time being I have put the old exhaust manifold and the twin 40s on the new spec engine.
I went to the rolling road to get the carbs balanced and to tweak the timing yesterday, the video in the previous post is a part throttle tuning run.
The throttle response is now very sharp and it revs really well, not quite as fast as the turbo setup at it’s best but it’s much nicer to drive.
I will try to do more videos soon and maybe it might even manage that mythical 15 second quarter mile time I’ve been chasing.
|
|
|
|
Post by swissdave on Feb 5, 2019 8:35:07 GMT
After some minor attention to the headlight wiring the little car is back on the road after it’s winter rest.
I last drove it in October and it was great to get it out and about again yesterday.
One of the Gaz front shock absorbers had developed a small leak from the top adjustment nut but as both had been away to Gaz for a rebuild last year they offered to replace the seal in the faulty one for free. Proper customer service, the full rebuild had only been £40 per shock.
In a couple of weeks I will be off touring North Wales for a few days as support vehicle for a bunch of crazy bikers called The Mad Cows, riding their home built trikes. Fingers crossed the weather behaves itself.
|
|
|
|
Post by swissdave on Feb 18, 2019 19:04:43 GMT
Over the last few days the car has covered 540 miles. A long run tavelling to Rhyl in North of Wales was day one of my trip with the Mad Cows bikers. Day 2 was spent blasting up and down some fantastic mountain roads and day 3 was the long motorway run back to Suffolk. The cruising in convoy on the motorway was all quite fast when we weren’t stuck in traffic and the day in the mountains gave plenty of opportunity to use the engine hard. About 1/2 litre of oil used and an average of 28 mpg over the whole journey. This was the longest run this version of the engine has done and bar a couple of issues it did really well. On the first day after a long motorway run the heat from the exhaust manifold melted the starter main power wire, the engine cut out and we stopped on the hard shoulder. Thankfully the negative terminal of the battery had melted sufficiently to be pulled off the battery and a full on fire averted. We had all sorts of tools and some spares with us and after a couple of hasty repairs we were back on the road. We replaced this burnt lead with another and some extra heat shielding the next day. 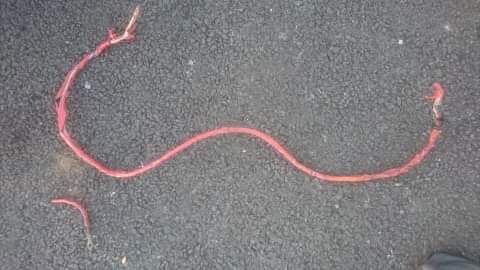 The next victim for the heat from the manifold was the steering aperture plastic shield. This became a piece of modern art at Betws y Coed after a traffic jam. 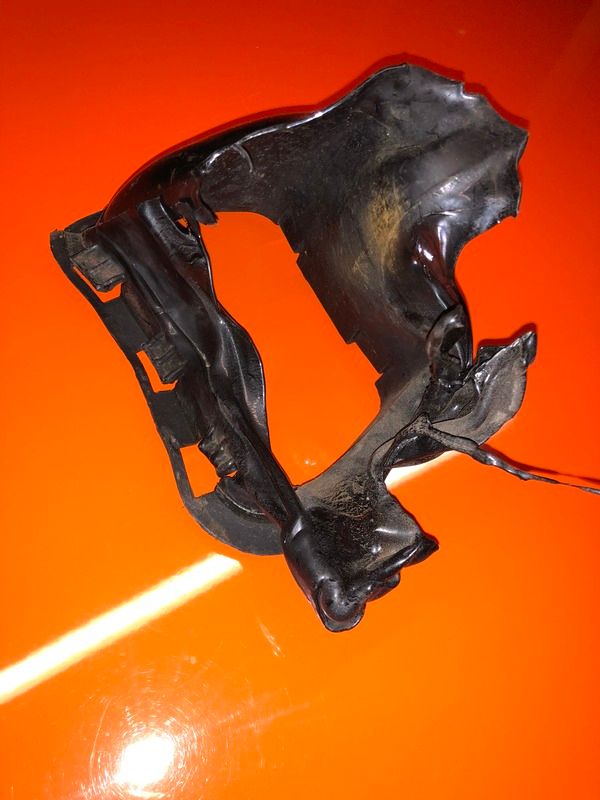 The cause of all this heat is a lack of ignition advance in the distributor at lower revs. The dizzy has been messed with a few times over the years now to try to get a better setup to suit all the mods to the engine and although the advance is about right at high revs giving good power the lack of advance at lower revs is putting a lot of heat into the exhaust. I think I will fit a Megajolt programmable ignition to it next as that can be set up to suit the engine at all revs and throttle positions. |
|
|
|
Post by swissdave on Apr 18, 2019 21:51:27 GMT
I have made a start on fitting the Megajolt ignition to replace the standard points and condenser distributor system. The new ignition will be fully programmable via a laptop and is a 3D system allowing ignition timing to be varied by both engine speed and engine load. The engine position signal is from a 36 tooth trigger wheel with a missing tooth that a sensor reads, the engine load signal will be from a throttle position sensor on the carburettors. Although the distributor isn’t needed for its usual role of providing sparks it needs the shaft that runs inside it to hold its drive gear into place as this also drives the oil pump. I cut the top of the dizzy body after shortening the inner shaft and made it into a mount for the new coil pack.    The front crank pulley with the trigger wheel fitted  The next job is mounting the crank sensor on to the block to read the trigger wheel.  |
|
|
|
Post by swissdave on May 8, 2019 18:43:48 GMT
I’m almost there with the new ignition system but I need to get my finger out and get it finished as I want to be ready to attend Princethorpe next month. The sensor for the trigger wheel was mounted on an alloy angle mount. 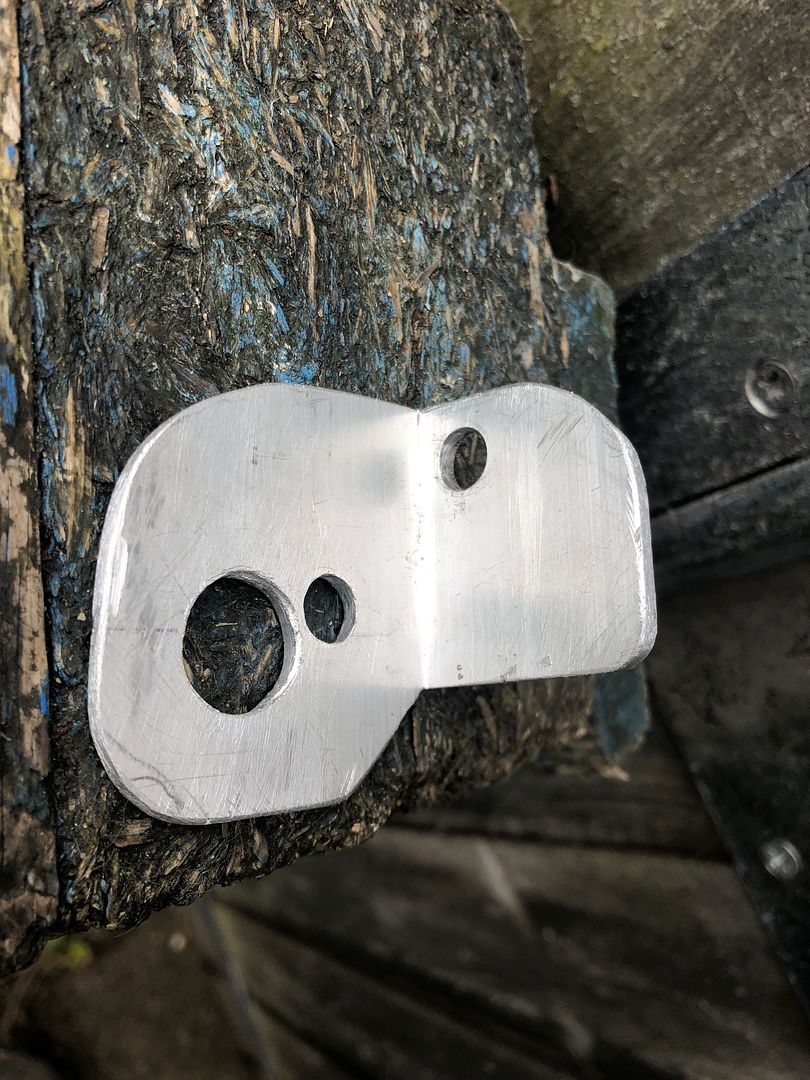 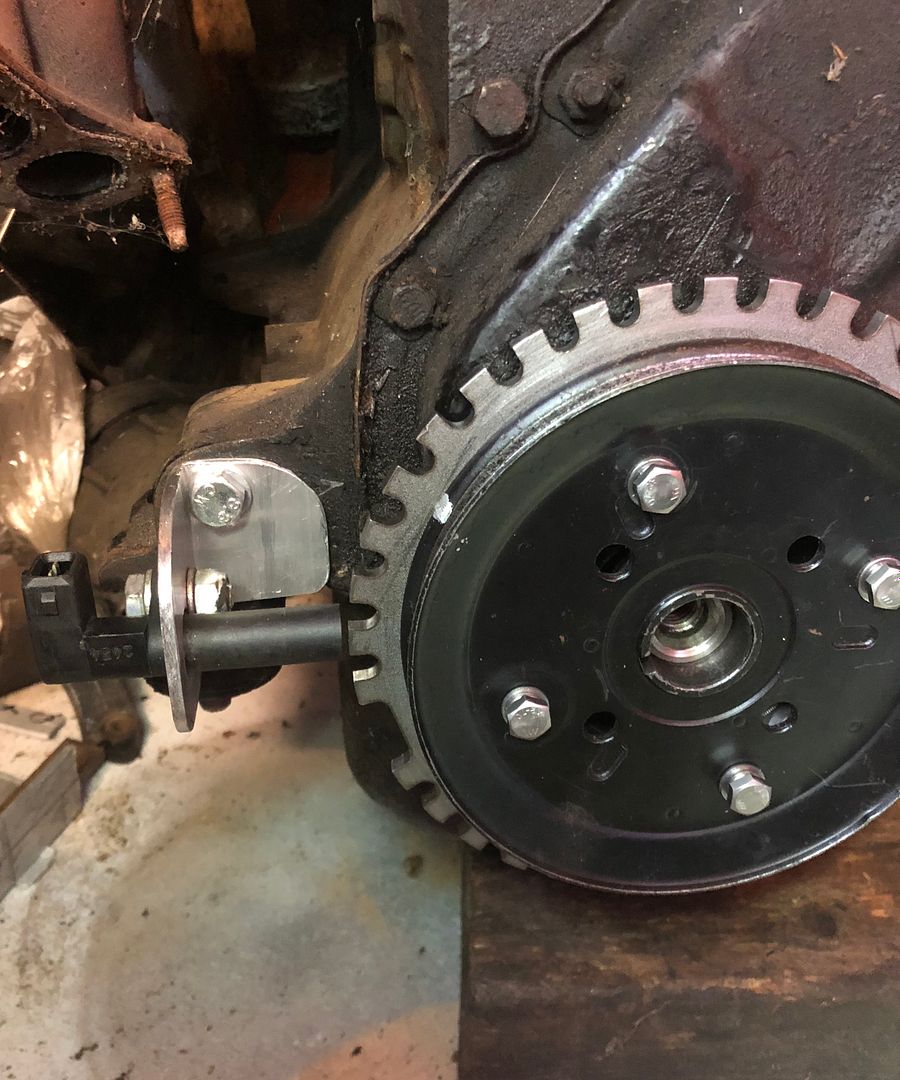 The throttle position sensor had to go on the flywheel end of the carbs so I have had to move the switch for the variomatic to the other end and I have made a new bracket with some adjustment provision 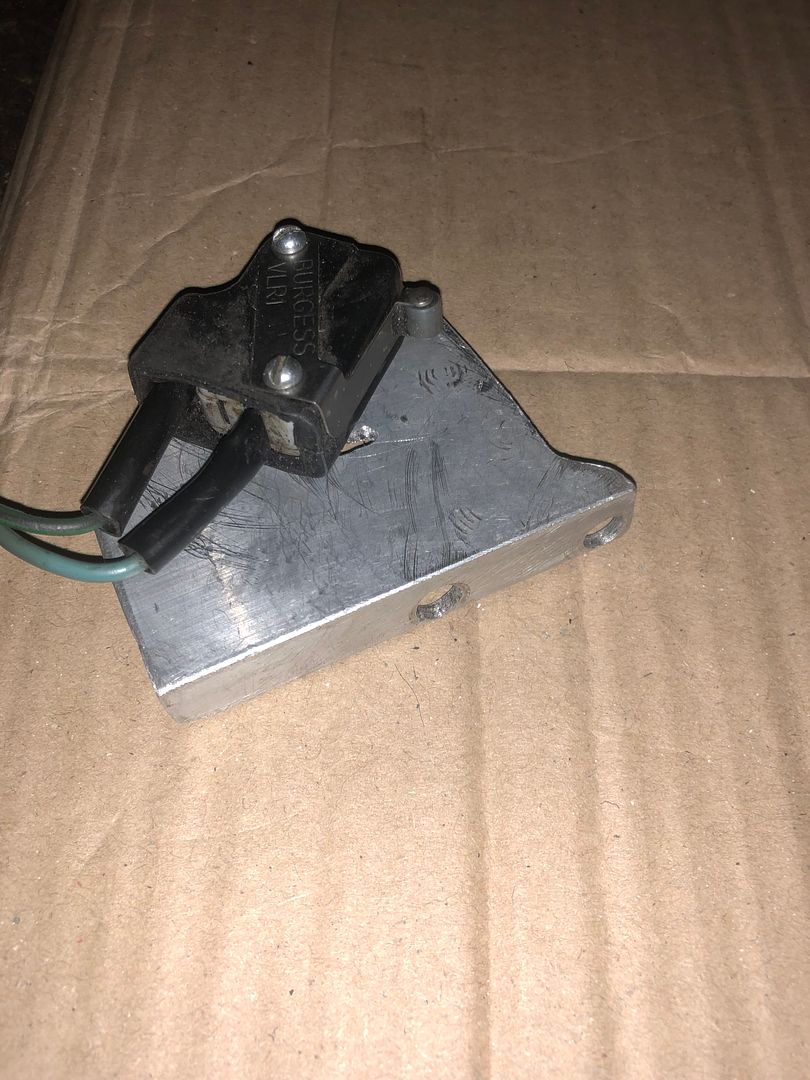 . The TPS; 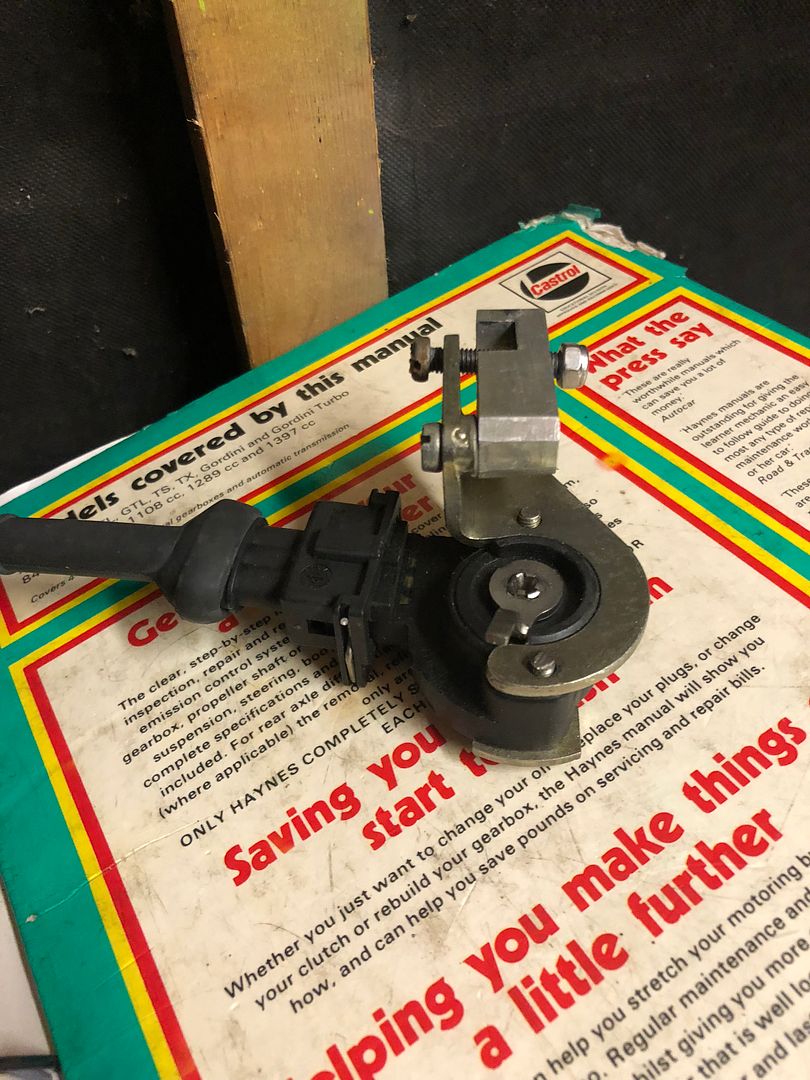 Mounted on the end of the carbs; 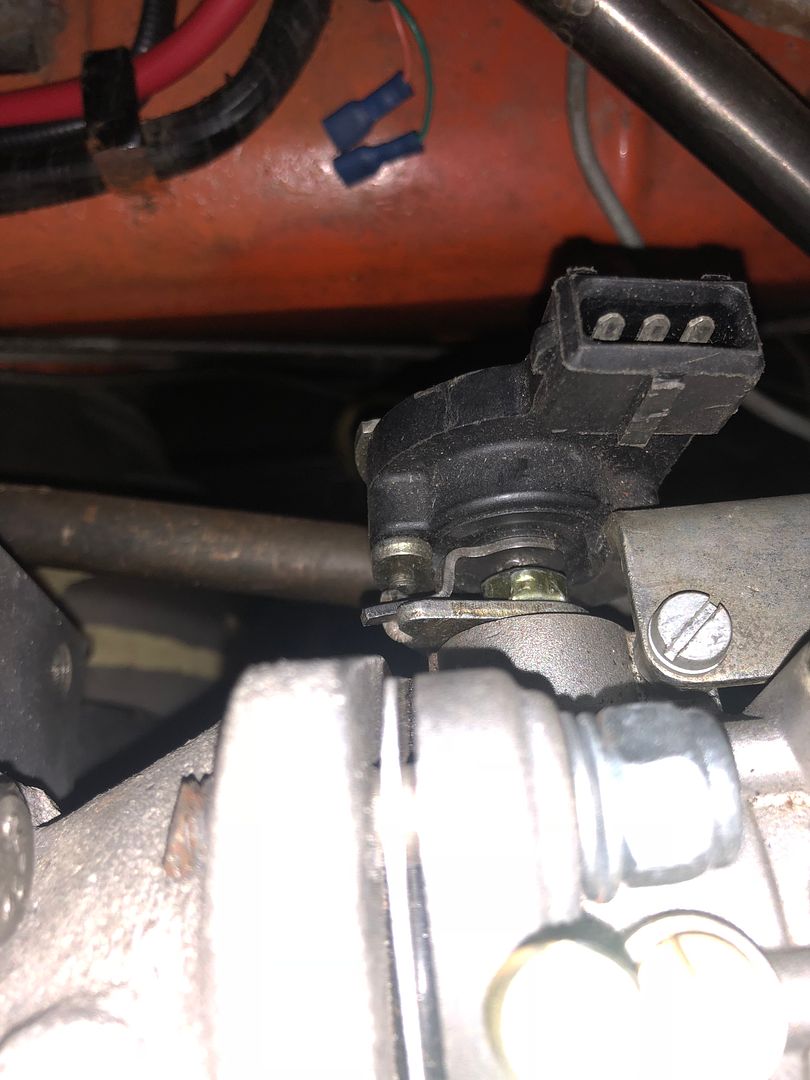 The megajolt system uses Ford EDIS ignition components from recent Mondeo/Focus/Fiesta models that is overridden by the megajolt ECU. 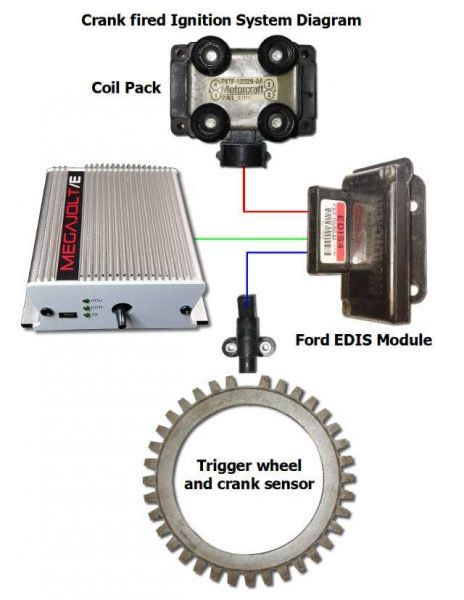 The configuration software loaded onto a laptop can quickly adjust ignition timing in 3D using a table like this; 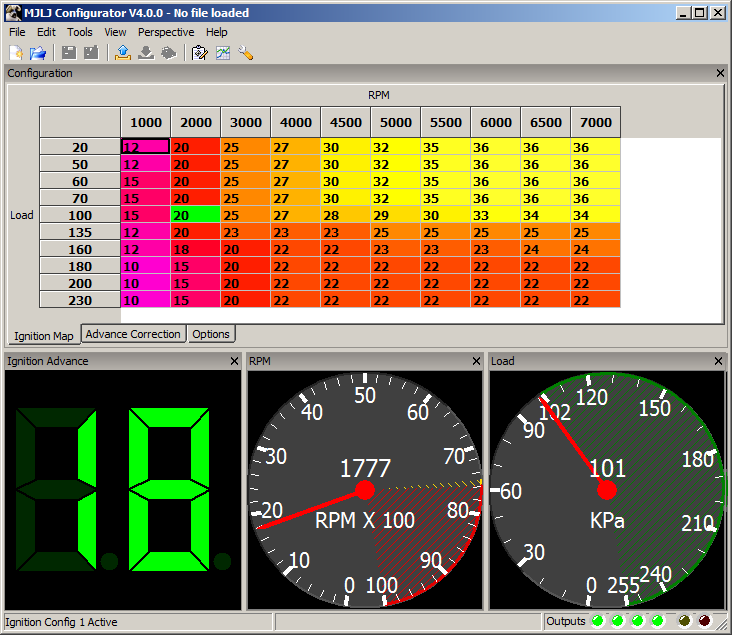 For the time being I have loaded the developers “safe” map as a starting point, a couple of hours to wire everything in and I should be ready to try and start it. |
|
|
|
Post by swissdave on May 18, 2019 8:25:34 GMT
I got the new ignition system wired up yesterday and it seems to work really well. The engine fired straight up and seems happier with a smoother tick over and the response to smaller throttle openings is much improved. Because this is a "wasted spark" ignition it fires on every upward stroke of the pistons, both on compression and exhaust parts of the 4 stroke cycle, it cleans the emissions up and the exhaust fumes smell a lot less fruity than before. I took the car out for a spin with my mate in the passenger seat with the laptop connected to the Megajolt so that we could see the software working and we adjusted the map a bit to see what difference it made, I find it amazing that you can alter it all in real time as you are driving about. The ignition map now needs tweaking by someone with more experience to get the best out of the engine, I may take the car back to Mike Jennings at the rolling road. As usual things didn't go perfectly to plan, the throttle position sensor is calibrated wrong and is reading too high and the rocker cover gasket I had reused leaked a small dribble of oil down the front of the engine but I'm pleased with this latest update. Edis unit mounted by the washer bottle: 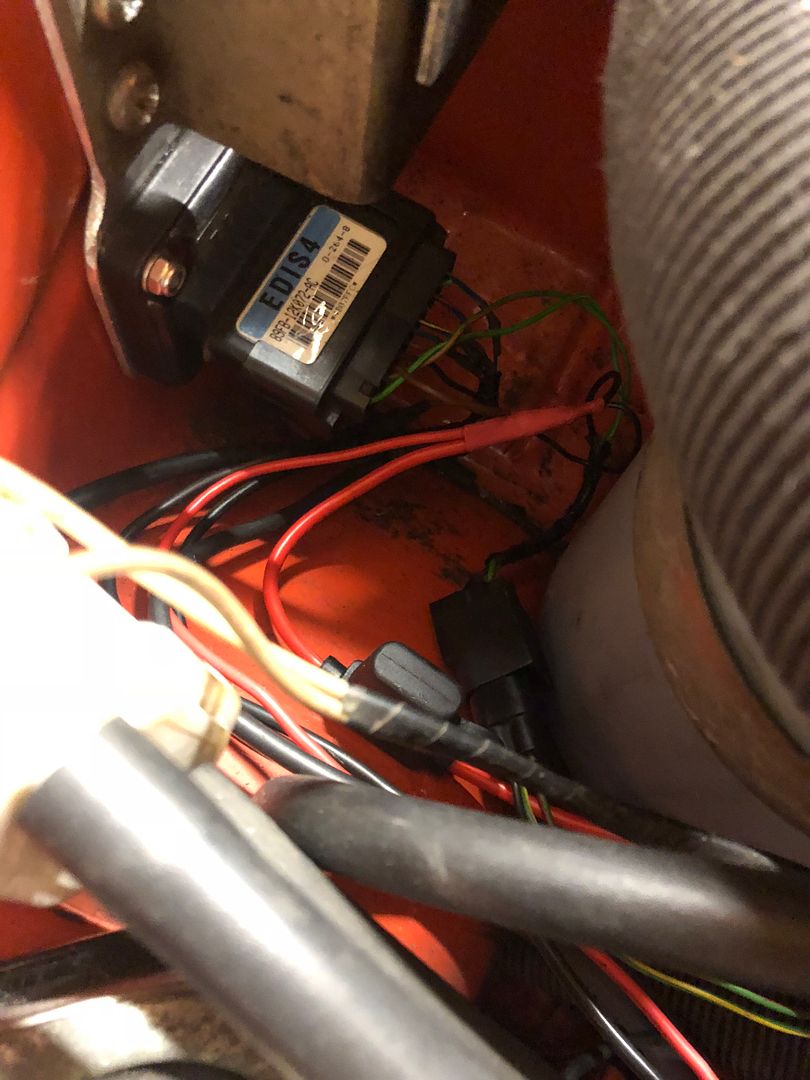 Megajolt unit needs to go inside the car, it will live behind the centre console. 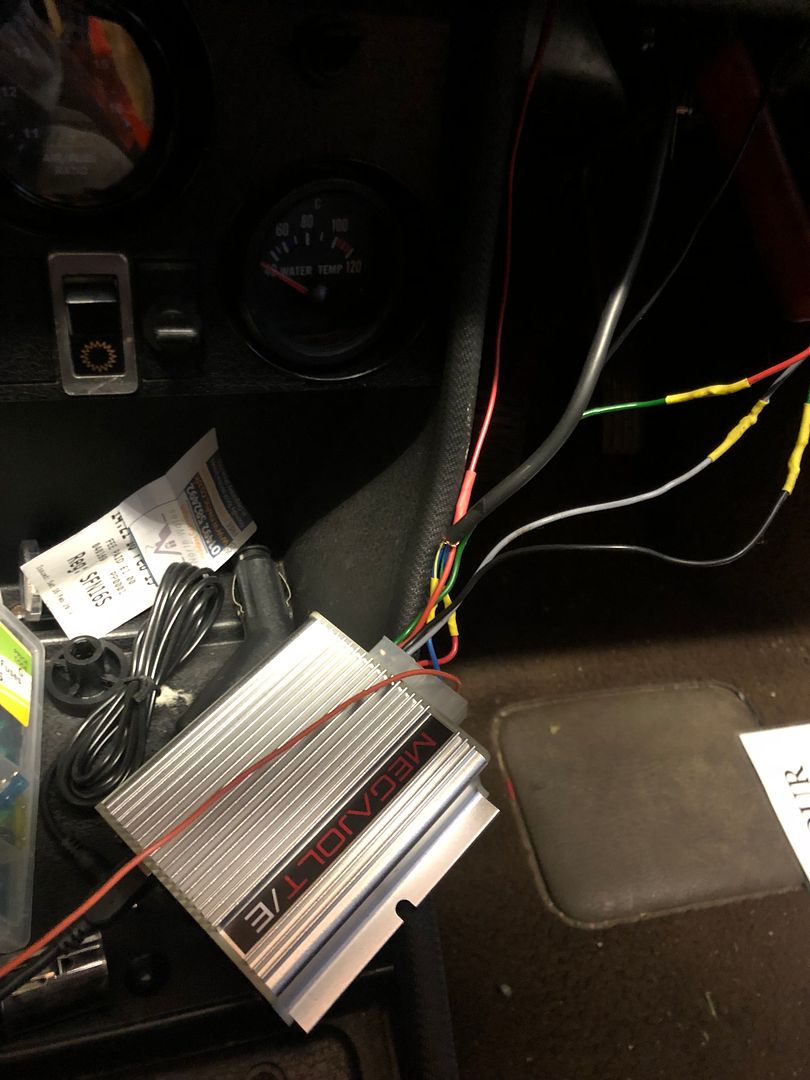 Engine bay with all the new ignition finished and new paint for the rocker cover, think Gold top, full fat! 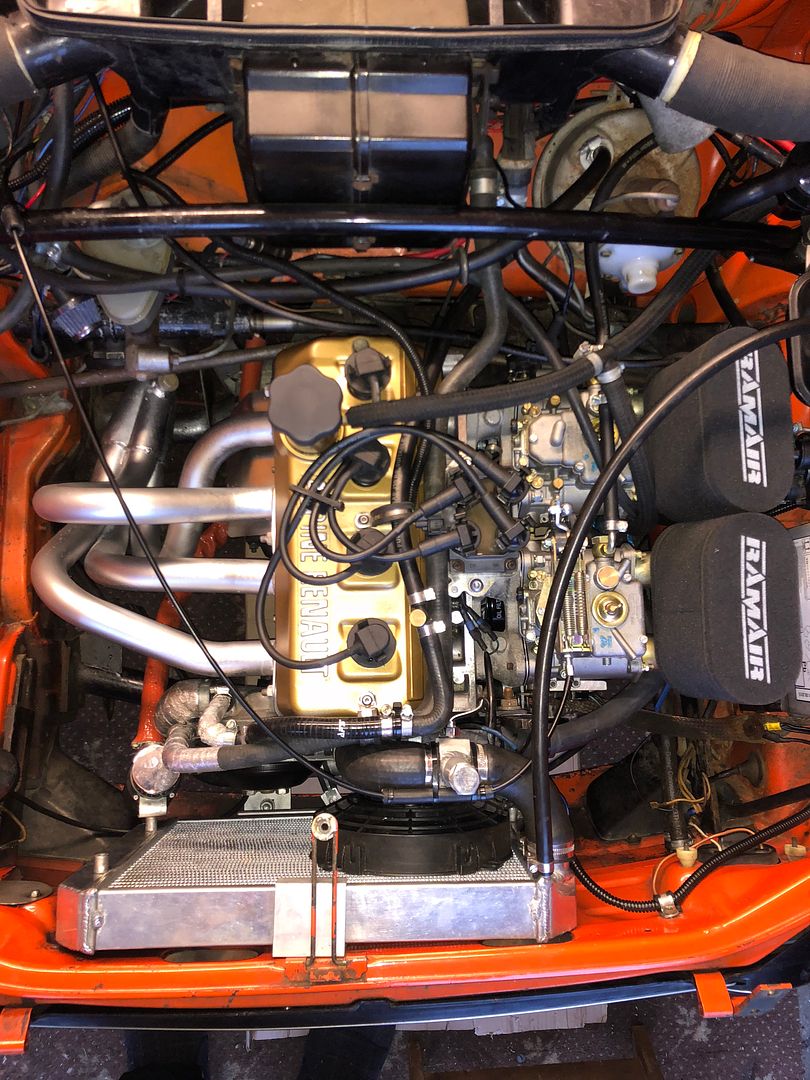 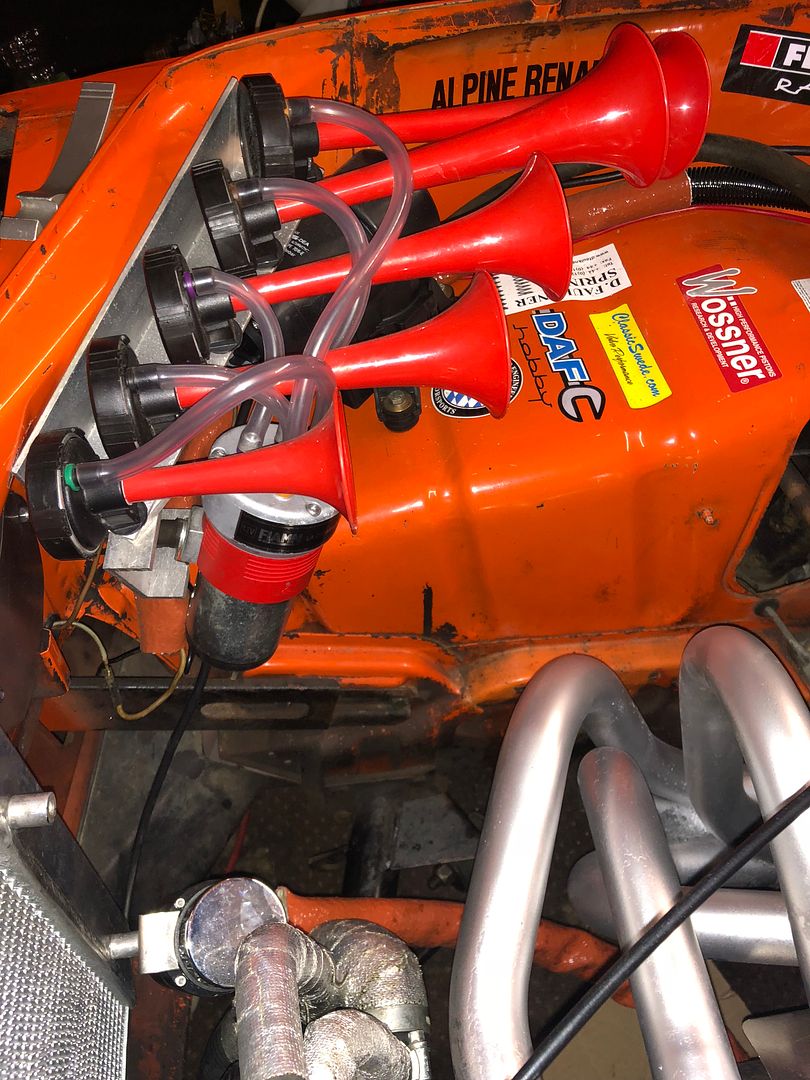 |
|
|
|
Post by swissdave on Jun 1, 2019 13:54:59 GMT
After a little tinkering and experimenting with the new ignition system the little car is now running really well, definitely the best it's ever been with this engine. A decent long hot weather run with frequent heavy traffic on a family day out to the beach this week proved that the extreme under bonnet temperatures are now, as I had hoped, much reduced - nothing melted this time!  Because I had managed to drop a box onto the boot lid over the winter and put a small dent in it I had the paintless dent repair guy out yesterday and he removed that dent as well as a long standing double dent in the drivers side front wing. He was quite taken with the car and commented that the metal was great to work with, "like Play-doh” and happily the 40 year old paint didn't crack either. 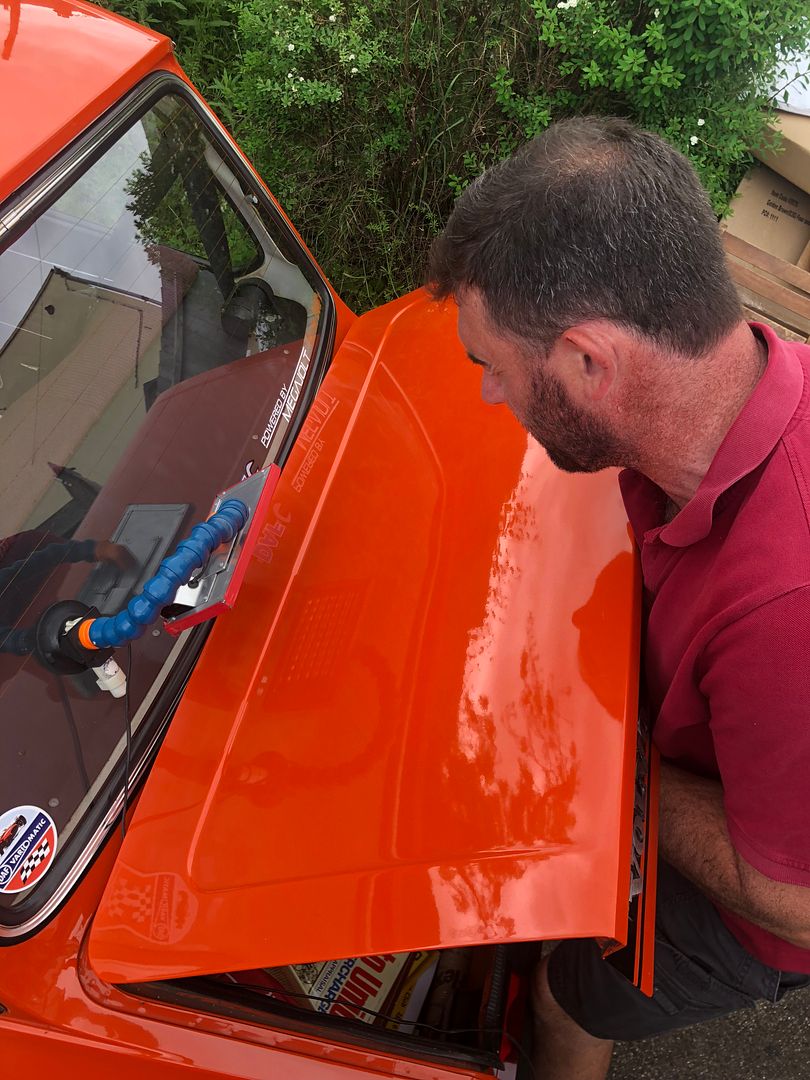 This next month will be quite a busy one for the car, a local classic car show next weekend, the retro show www.retroshow.co.uk/index.php on the 15th/16th at Santa Pod where I will be trying the new setup on the 1/4 mile drag strip on the Saturday then the Show and Shine on the Sunday and then Pricethorpe on the 23rd! |
|
|
|
Post by swissdave on Jul 17, 2019 21:08:30 GMT
|
|
|
|
Post by swissdave on Sept 10, 2019 13:08:35 GMT
Hi all. Those of you who receive the rather excellent Belting Along club magazine may have seen my write up of my 66’s latest efforts at the drag strip.
I would like to get the car capable of a 15 second quarter mile and if the strong headwind on the day had reduced I would have run the car again and I’m sure it would have managed it.
As it was, a 16.1 on the first run in this video below followed by a 16.06 on the second run was very close.
Over this winter the engine will be back out again in the quest for some more power, I will post the updates on here as usual.
|
|
|
|
Post by swissdave on Oct 5, 2019 12:46:11 GMT
It’s that time of year again, I’ve just had a nice new bigger garage and workshop built as part of an extension on the house and in a couple of weeks Gordon will be tucked up in there ready for this winter’s round of upgrades. I’ve started collecting some bits, Dafhobby supplied some upgraded front discs, these are direct bolt on replacements and with the Ferodo race pads I fitted earlier this year should help out in the braking department. 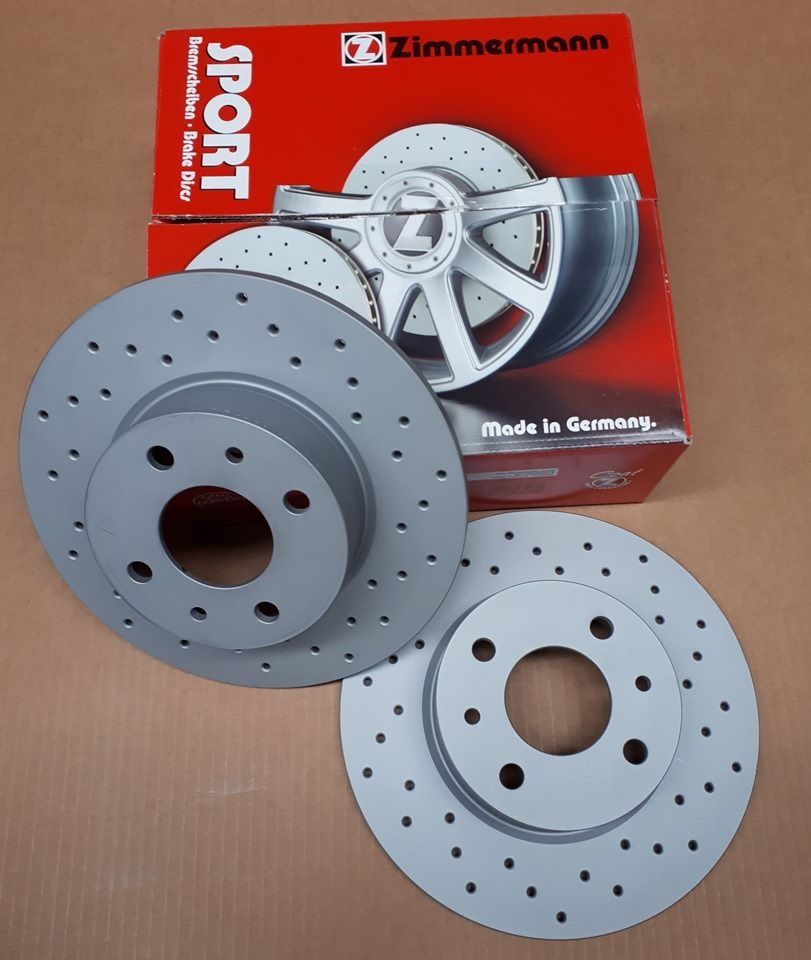 The engine will be out as soon as I can, I have decided a Rotrex C15-60 supercharger is the way to squeeze some more power out of the venerable Cleon lump. The boost curve on this type of sc is linear as in the boost is highly dependent on revs. For the variomatic setup this seems a good plan as the weaker parts of the drive train will need to be spinning at high revs with the engine before the much higher power levels are produced and should stand a better chance of handling it. A normal supercharger produces high boost from almost tick over and would place a lot of stress on the drivetrain at lower revs where it is most likely to be damaged.  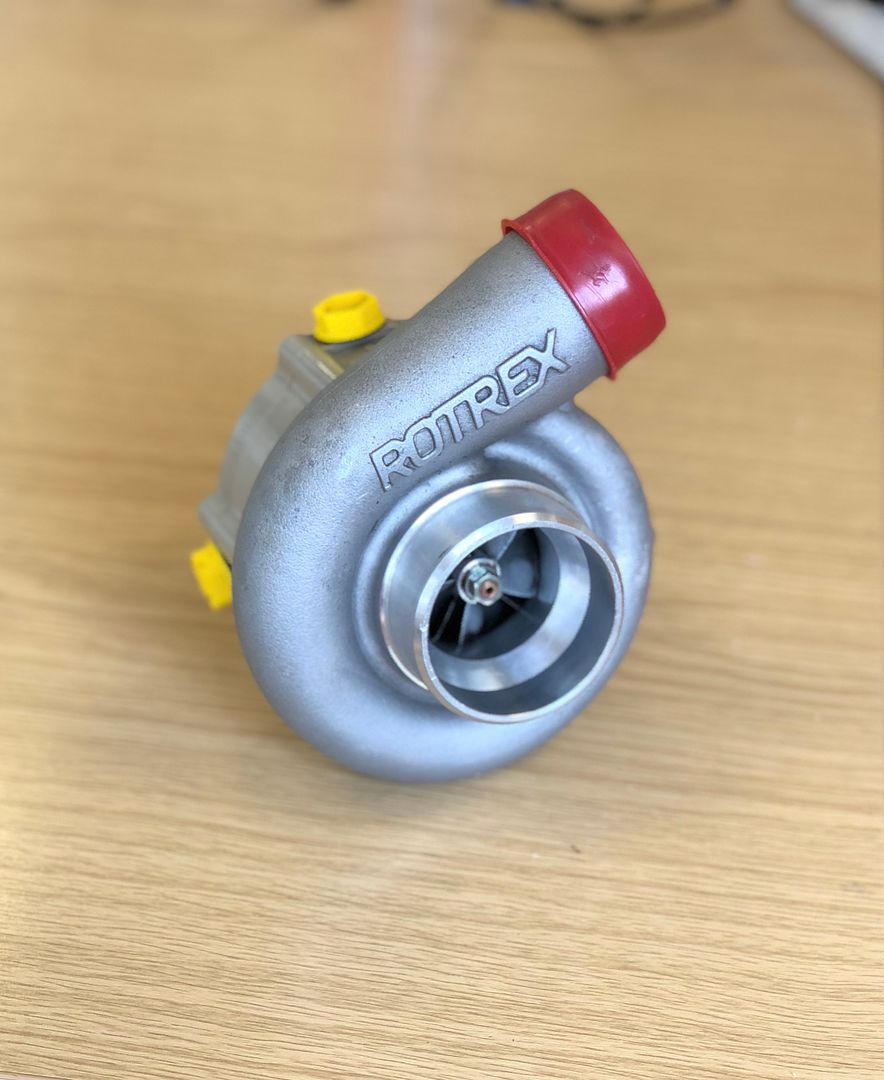 To support this upgrade I am going to go full EFI with proper engine management, my fabrication and welding friend is making a new inlet manifold with the fuel injector bosses and I am going for a very clever air/water Intercooler built into the inlet manifold. This is a bit hard to explain so I will post more about it once the manifold starts to take shape. I will be lowering the compression ratio a couple of points as well, the plan is to run a peak boost level of 11 psi and if all goes to plan I’m hoping for about 180 horsepower at 6500 rpm, at the moment the engine makes about 120 on the twin Webers with high compression. Keep your fingers crossed for me.😄 |
|
|
|
Post by dafdaffer on Oct 6, 2019 20:22:29 GMT
You really are very talented when it comes to modifications, i am watching with envious eyes.
good luck with the supercharger, keep us posted
|
|
|
|
Post by swissdave on Nov 13, 2019 18:42:14 GMT
Some progress on the engine. The inlet manifold is nearly finished, I saw it today and took some photos. I’ve abandoned the charge-cooler inside the plenum idea as it was just so complicated so I will be using a more conventional front mounted intercooler. Instead I’ve designed a “Lehmann” or “twin plenum” type of inlet. This is often used on turbo rally cars, from the group B Quattro of the 80s through to modern Skoda WRC, I’ve also seen it on some high end performance upgrades for Jap stuff. www.bufkinengineering.com/intake%20manifolds.htmAs I was having a manifold and plenum made for the conversion to fuel injection from scratch anyway I thought it should be as good as possible. The theory of this type of plenum is that the compressed air from the supercharger is forced down a reducing cone section, this is the first plenum, then through a narrow slit over the length of the whole of the second larger plenum. This distributes the air equally so that all four inlets receive the same amount. A standard single plenum fed from the end as fitted to most injection engines favours the cylinder furthest from the inlet. 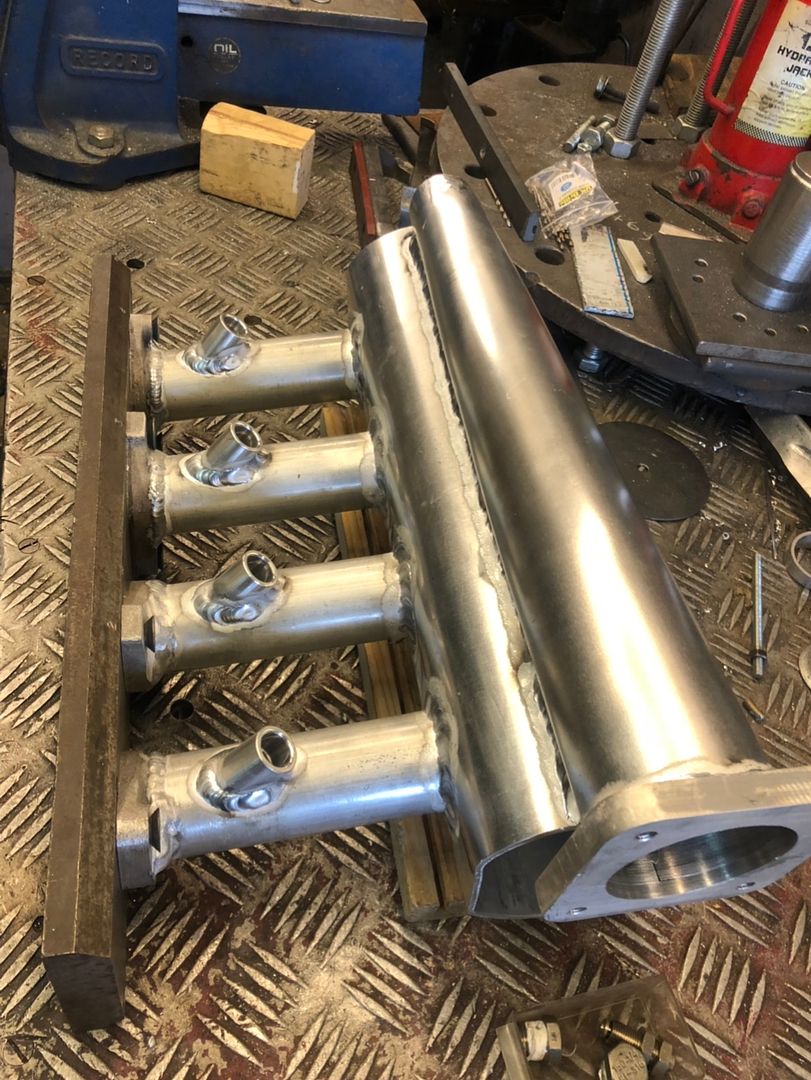 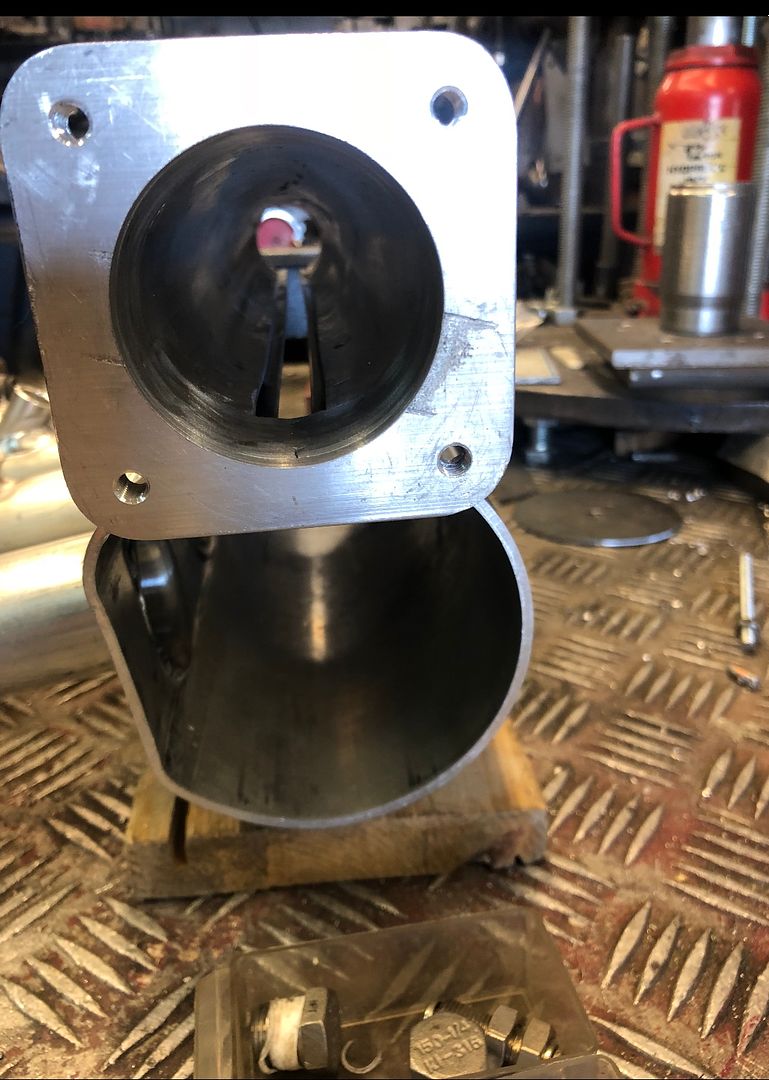 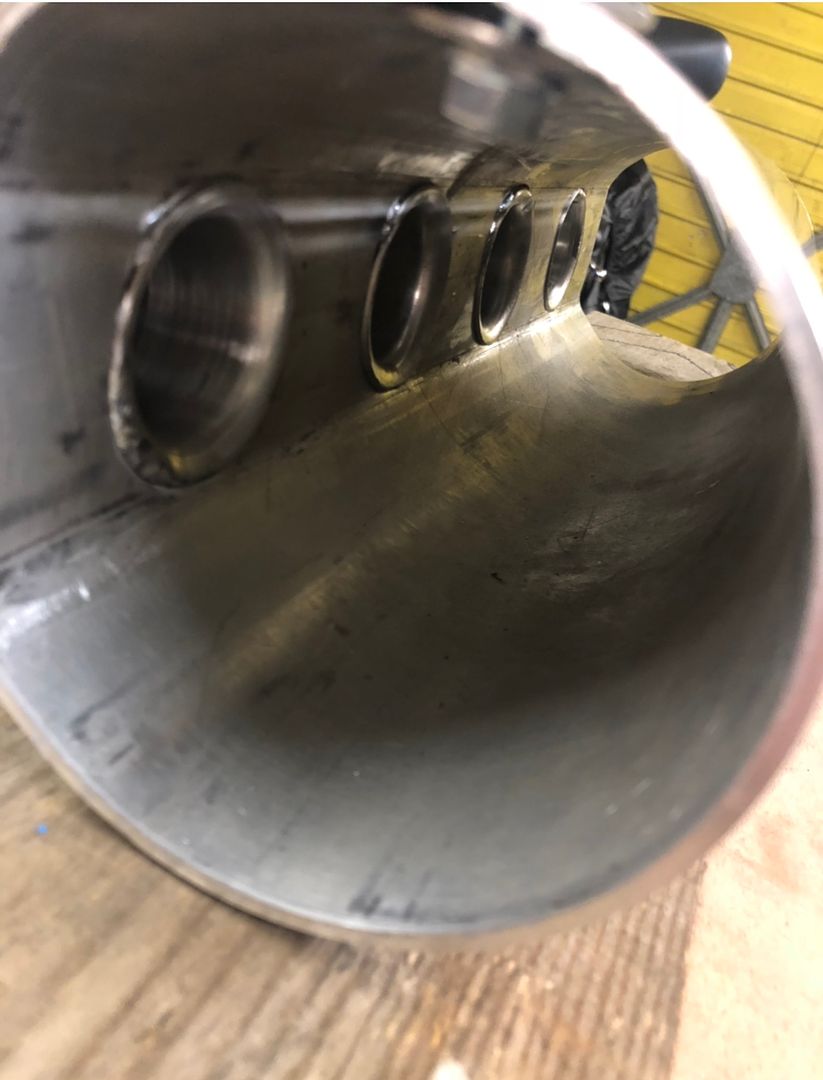 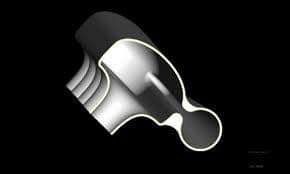 |
|
|
|
Post by mtjm on Nov 13, 2019 19:31:10 GMT
That's very neat! Not a concept I was aware of, but I can see the advantages. Looking forward to seeing more.
|
|
|
|
Post by swissdave on Nov 25, 2019 17:35:07 GMT
It took until yesterday for me to finally get the car into its new garage. The plenum is now finished and the next job is to mount the fuel rail that will supply the injectors. Next weekend I will take the engine out so that I can start work on brackets and pulleys. Some photos 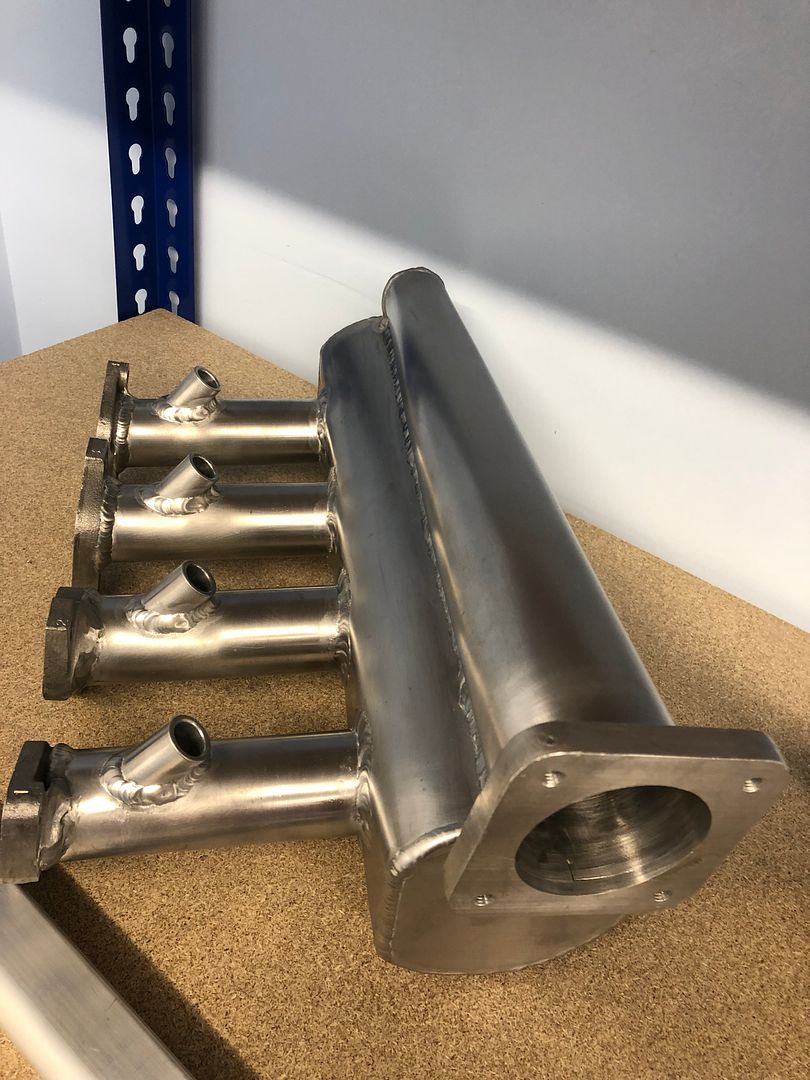 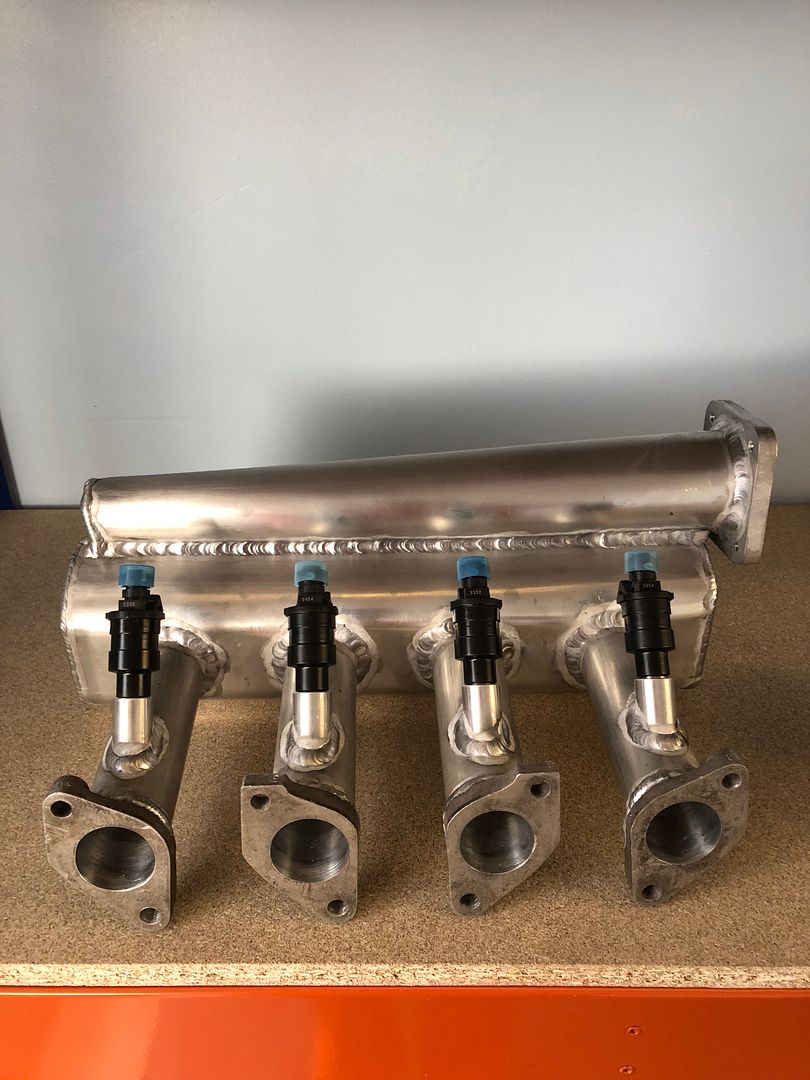 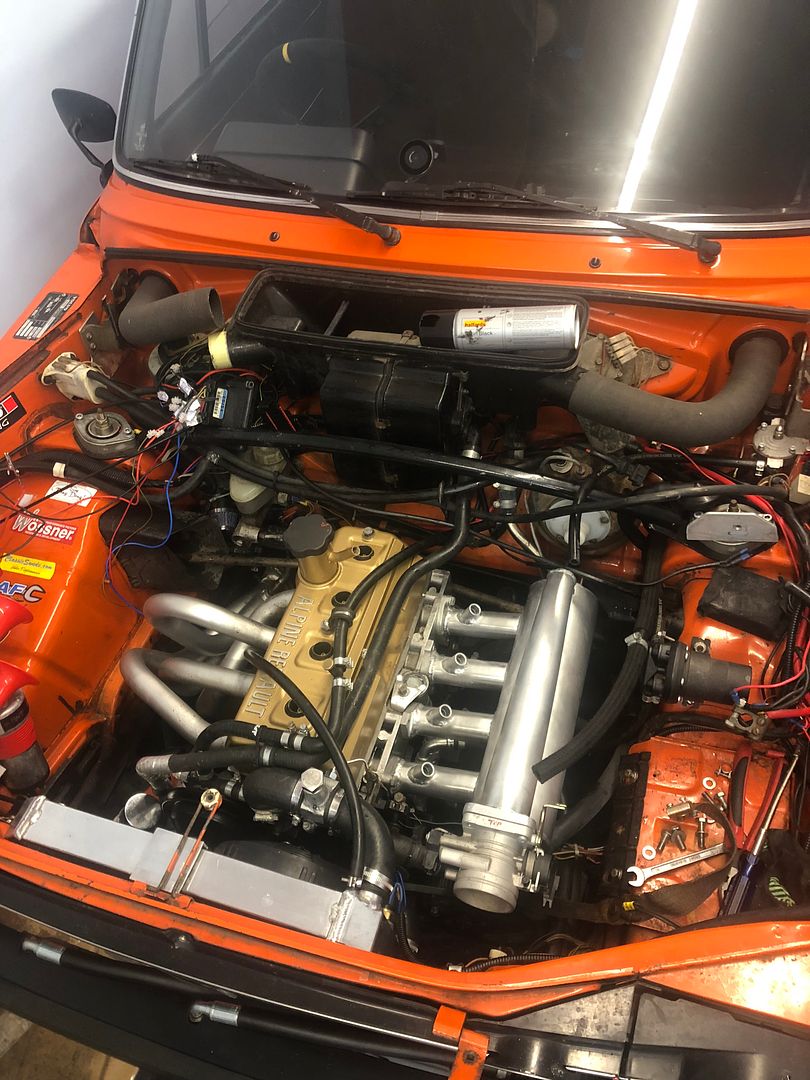 |
|